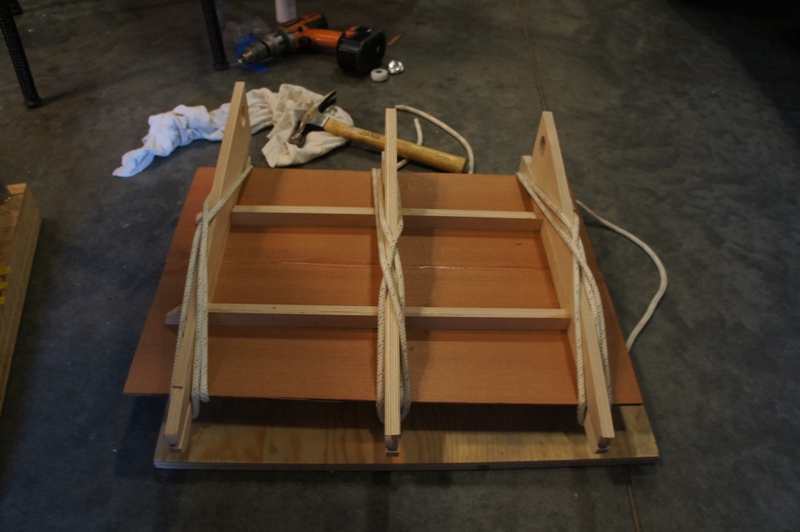
I've been waiting for my new shop to be finished before getting going on this guitar, but the shop still has a couple of weeks to go — so I started this project in my garage. I was able to use my new LMI plate gluing jig to glue the top and back plates together. I made a rosette from some spalted veneer from a mystery pack of rosette wood I have.
Lesson Learned
It was progressing nicely until I tried to fill the Purflex purflings with black epoxy before sealing the end grain of the redwood. Let's just say I now have some nice wood for a ukulele top that I can salvage.
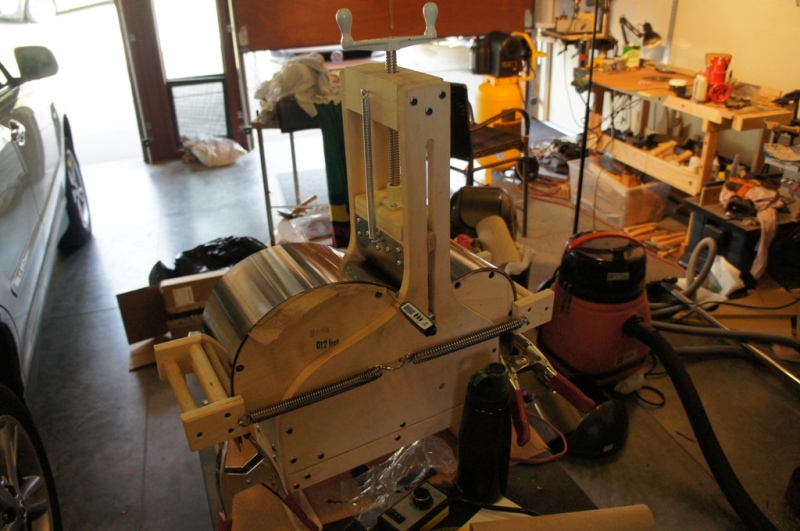
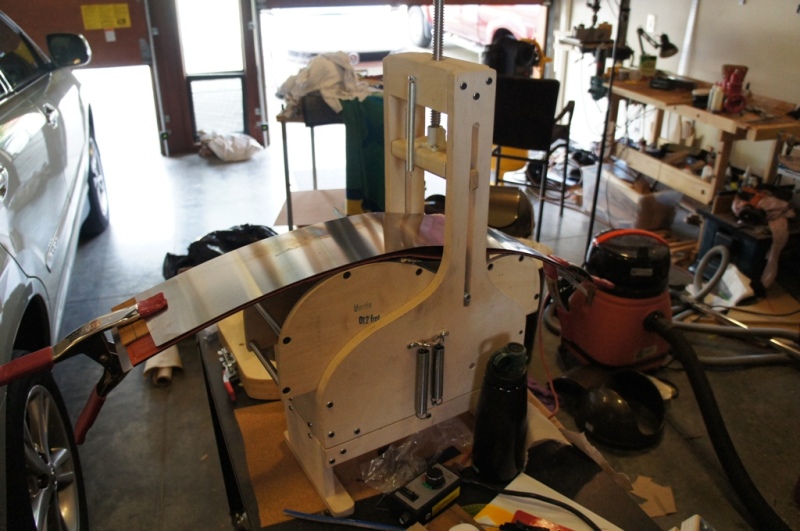
I went ahead and bent the sides with my Blues Creek guitar bender — that all went well. The sides were thinned to a bit over .09" before bending.
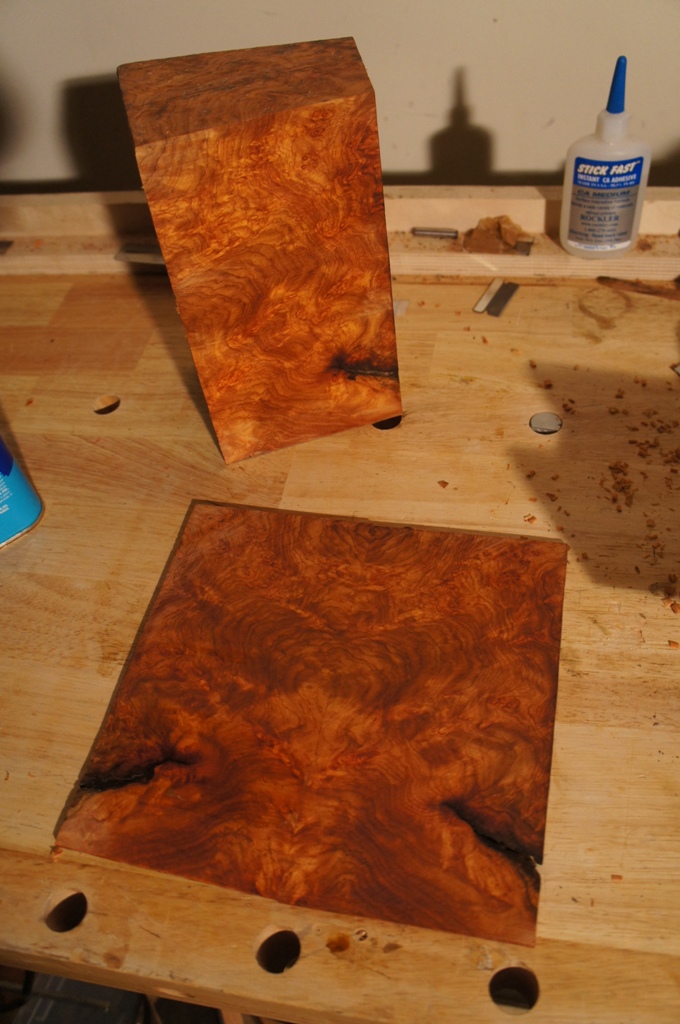
Feeling bad about the lost top, I went to my local Rockler store and found a chunk of Amboyna Burl to use for the rosette and possibly a headstock veneer. I resawed a couple of pieces of veneer, sanded them level, and glued them together book-matched.
Amboyna Burl — book-matched for the rosette and headstock veneer
✦
November 8th, 2011
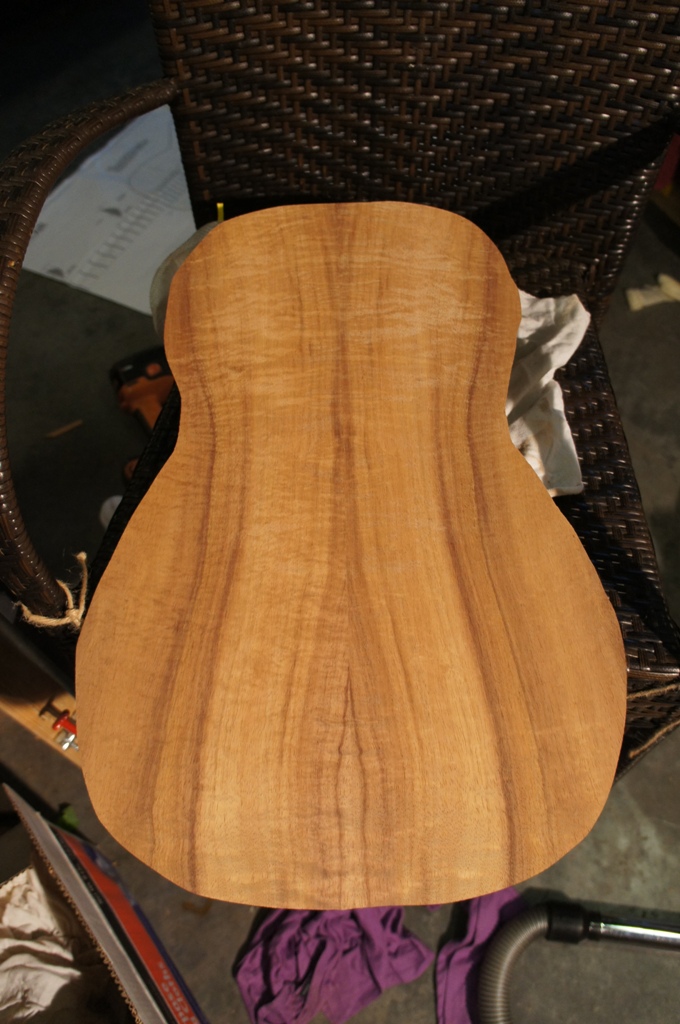
I put together a cedar top — at least that's what it smells like. I have three sets. It is perfectly quartersawn and has the most glass/bell-like tap tone I've ever heard. I think I bought this at a GAL auction this summer. (I should keep notes!) It will be interesting to hear what it sounds like on a guitar.
The replacement top — Western Red Cedar, perfectly quartersawn, incredible tap tone
✦
November 12th, 2011
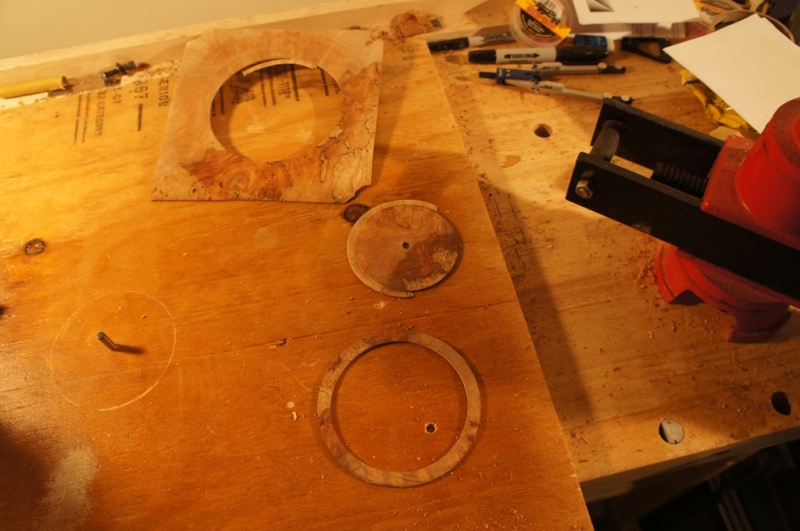
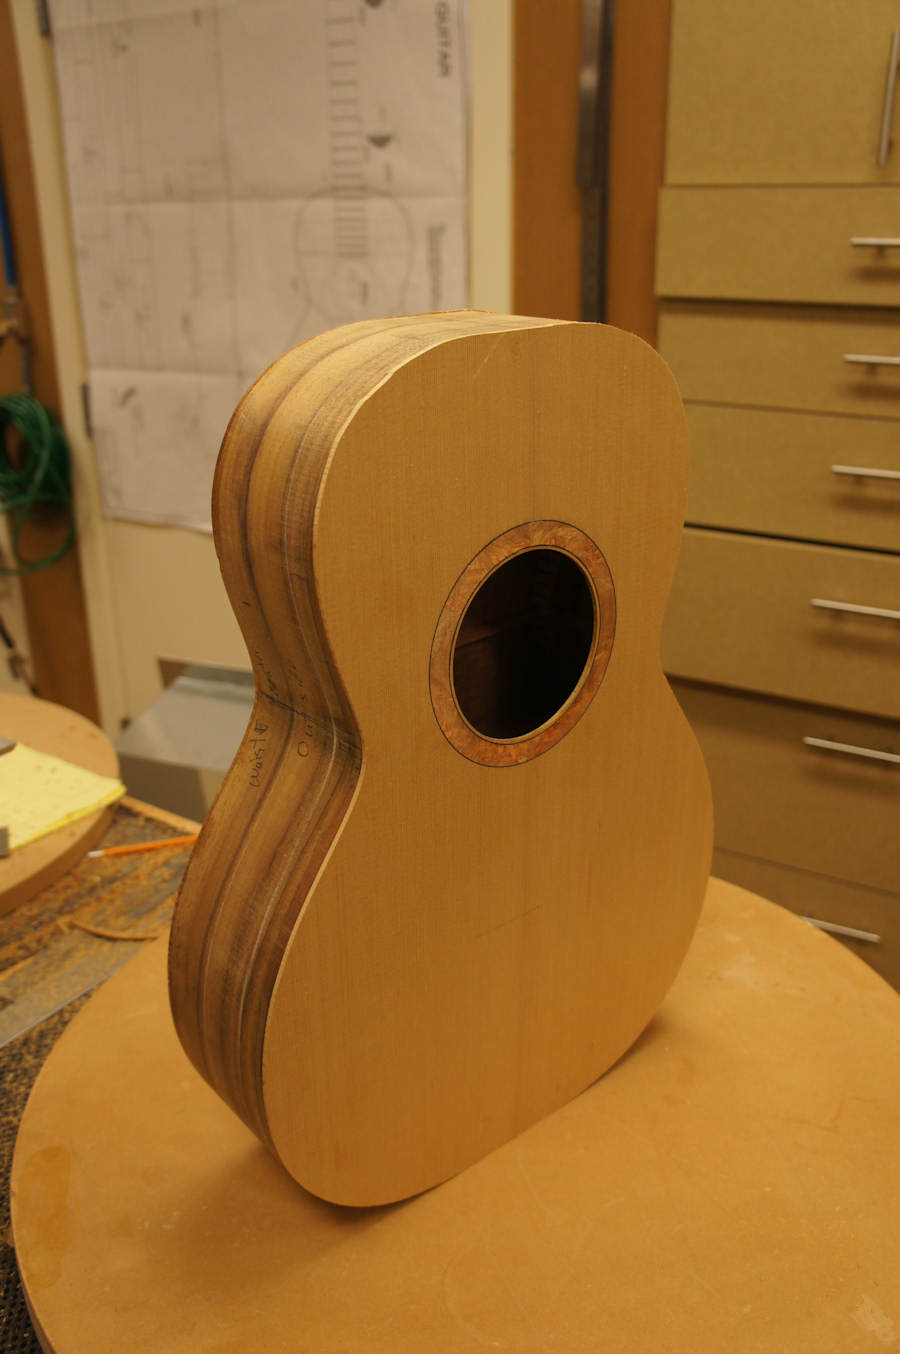
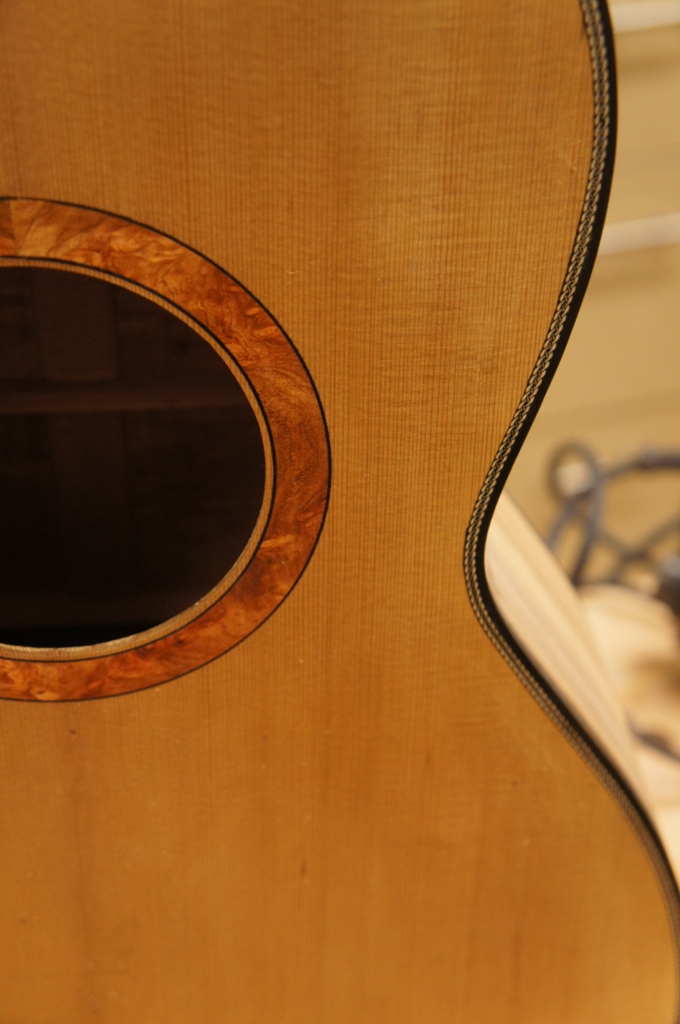
Rosette and top — take 2! After the last top disaster I set off to put a new rosette on the new top. As shown previously I cut and book-matched the rosette veneer out of Amboyna Burl. I spent a little time laying out exactly what I wanted, as opposed to winging it which is my normal style.
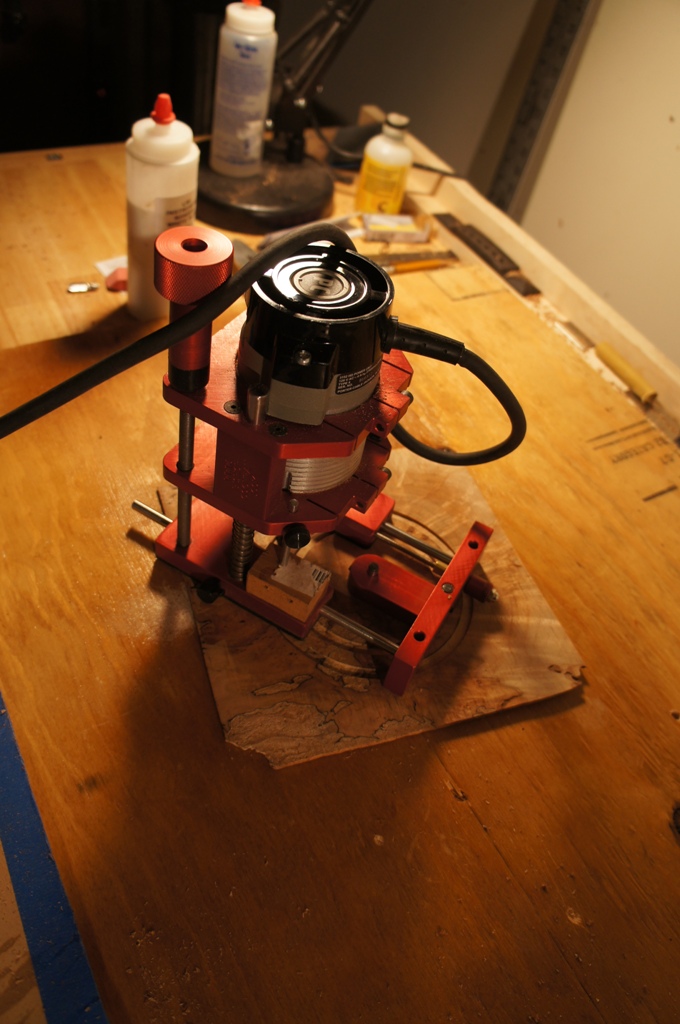
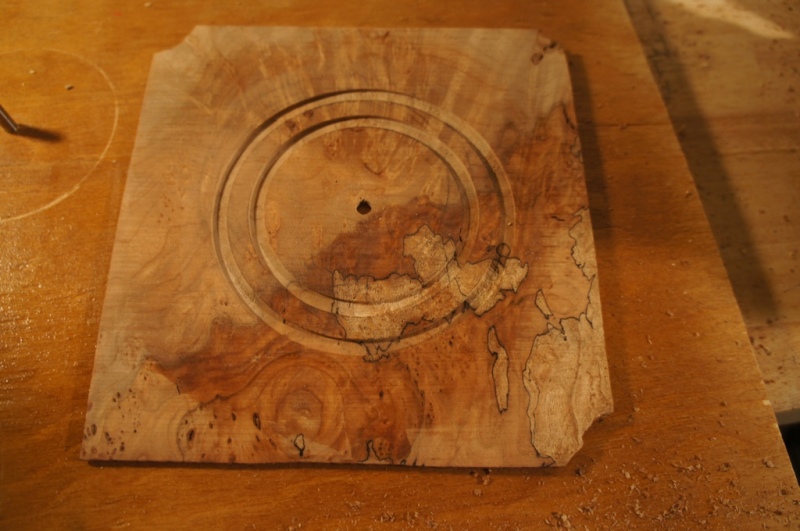
I went with a slightly bigger sound hole — 3¾" rather than the 3.5" in the Antes plans I have. I like the look and hope it gives me a bit of a deeper resonance. The next batch of pictures show how I learned to make wood rosettes from Rick Davis (runningdog). Using the router I carefully route out the rosette only to the depth that matches the thickness I want. Once routed I run it upside down through my drum sander until the rosette drops out. This keeps the rosette nicely centered in good wood while doing all the routing.
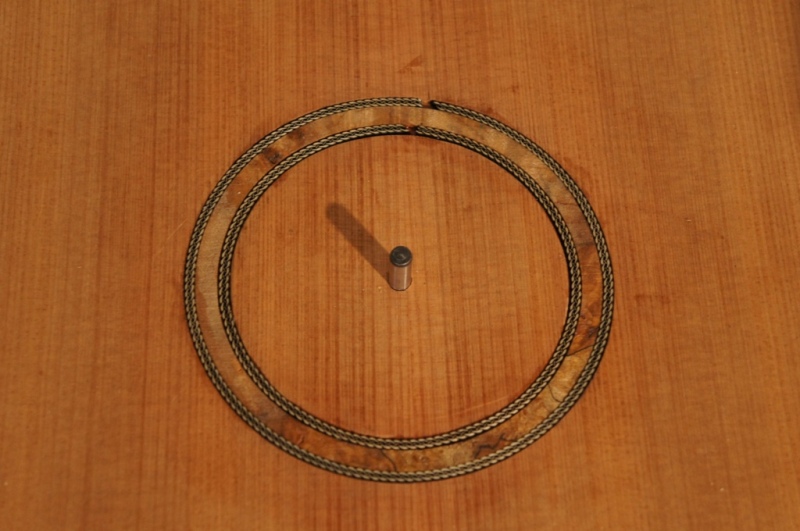
With the rosette made, I carefully laid out and routed the rebate for the rosette and inside/outside fiber purfling at .020". This time before doing anything with glue I shellac'd the rebate to avoid stains. The rosette fit so well I used thin CA to glue it down. After leveling I applied a wash coat of shellac to protect the top until much later in the project.
Amboyna Burl rosette on Western Red Cedar — beautiful recovery from the first attempt
✦
November 27th, 2011
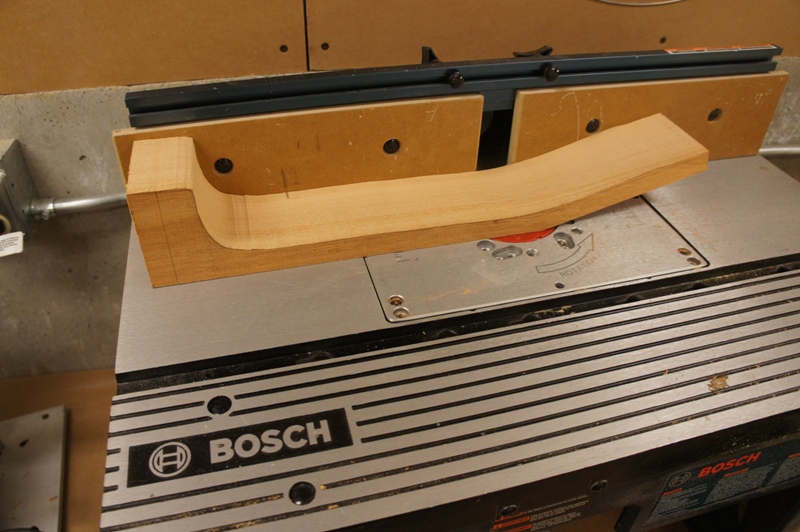
Finally with my new shop together I'm building guitars again! I had a fun holiday weekend working Friday through Sunday — most of Friday was still setting up, but Saturday I used cutoffs from a plastic place to make a body and neck template for the Martin 1905 Parlor guitar.
Body and neck template for the Martin 1905 Parlor, made in the new shop
I fit the previously bent side into the rim and was really happy with the way the sides book-matched — I wasn't really thinking about book matching when I cut and bent them, but by carefully marking and lining up the waist and cutting them together on the bandsaw they came out perfectly. I profiled the sides on 28' and 15' dishes and glued in the kerfling, using reverse kerfling on the top for the first time.
Reverse kerfling — a first for this build
I thicknessed the top and back on the drum sander, tap tuning as I went. I thinned the top tapping as I got close to the desired thickness. At one point the top really rang out — I kept going as taught, and when the top started to sound a bit chaotic I stopped. The Western Red Cedar ended up at .110" (2.8mm).
✦
December 3rd, 2011
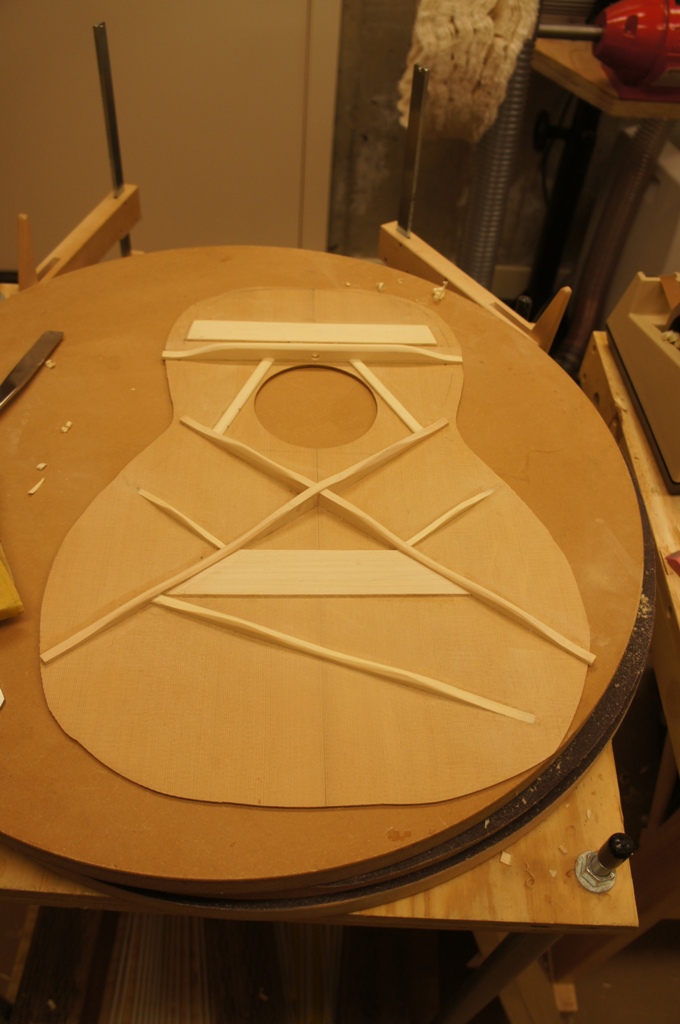
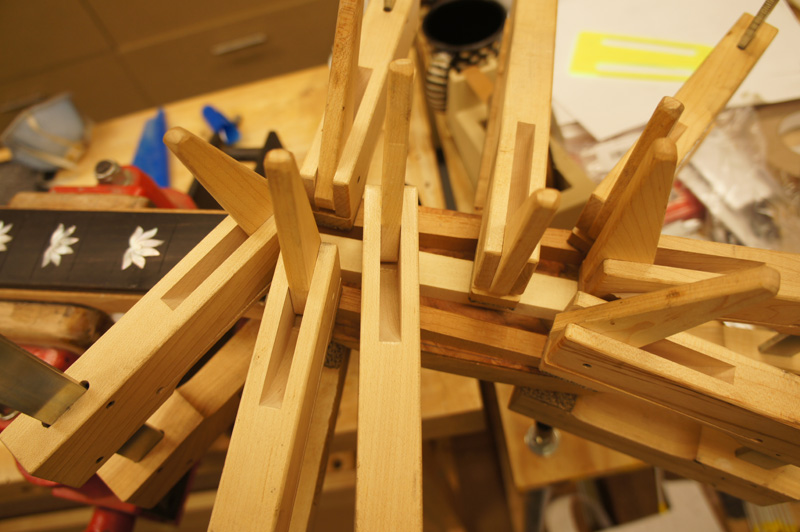
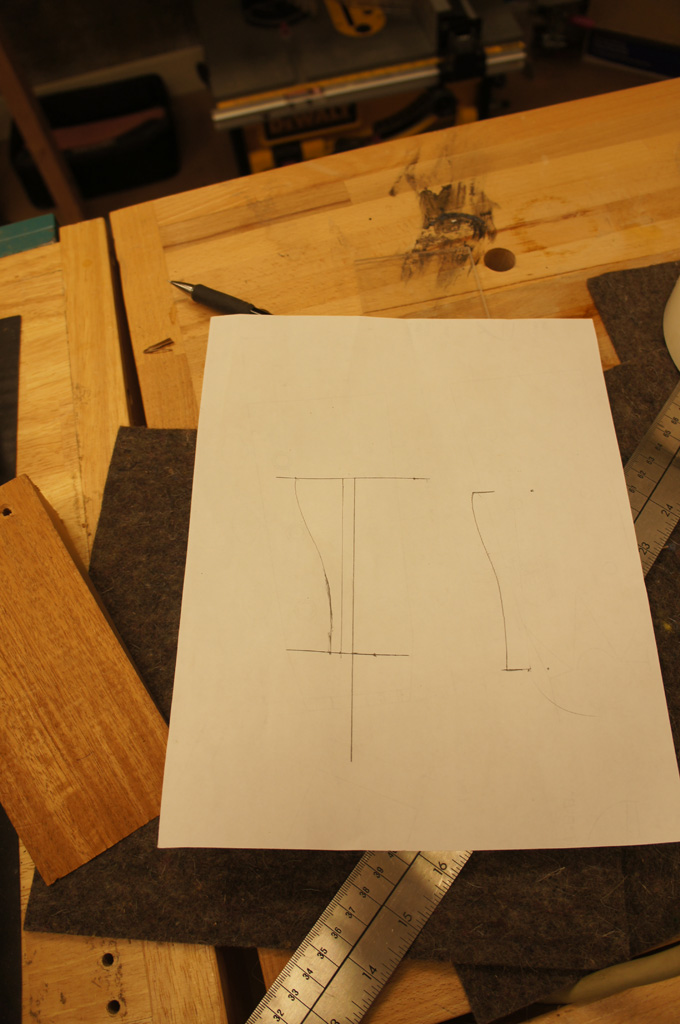
Made a bit of progress on the Koa guitar for my niece. The last few days I glued on most of the braces to the top. While waiting for braces to dry today I got the neck blank roughed out. I made three sets of X-braces before I was happy with the fit and angle — the first was at the wrong angle, the second had one brace leaning due to an angled slot.
Mistake Worth Noting
If you look closely at the picture you can see the preview to my next mistake — I drew the face brace line from the mark I had for the lower bridge. You can see the correct mark under the line.
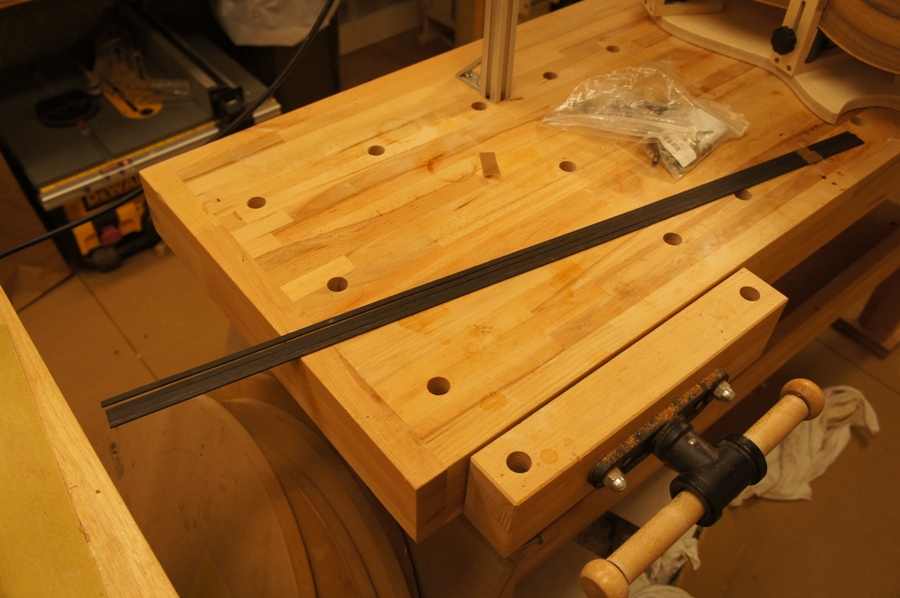
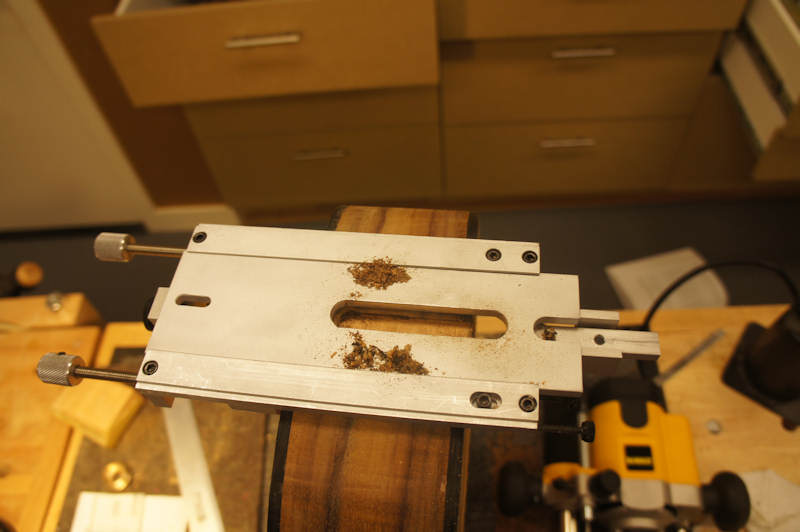
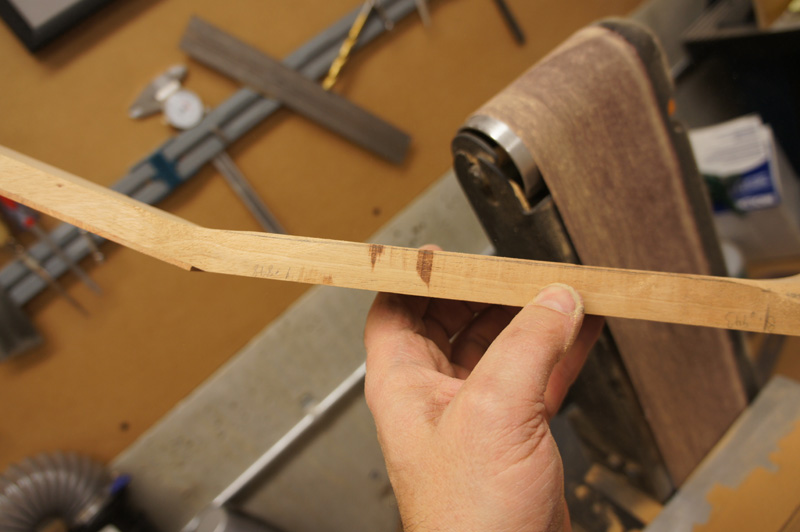
I cut out the neck blank a little oversized on the band saw, then used a Veritas low-angle jointer to clean up the faces and establish the nut and 12th fret lines. I used a ½" end mill on the router table to cut the channel for the carbon rods and truss rod, then used a chisel to ensure they sat slightly below the neck face. I epoxied in the carbon rods using the truss rod as a clamp. Finished the day cutting and gluing down the maple bridge plate.
✦
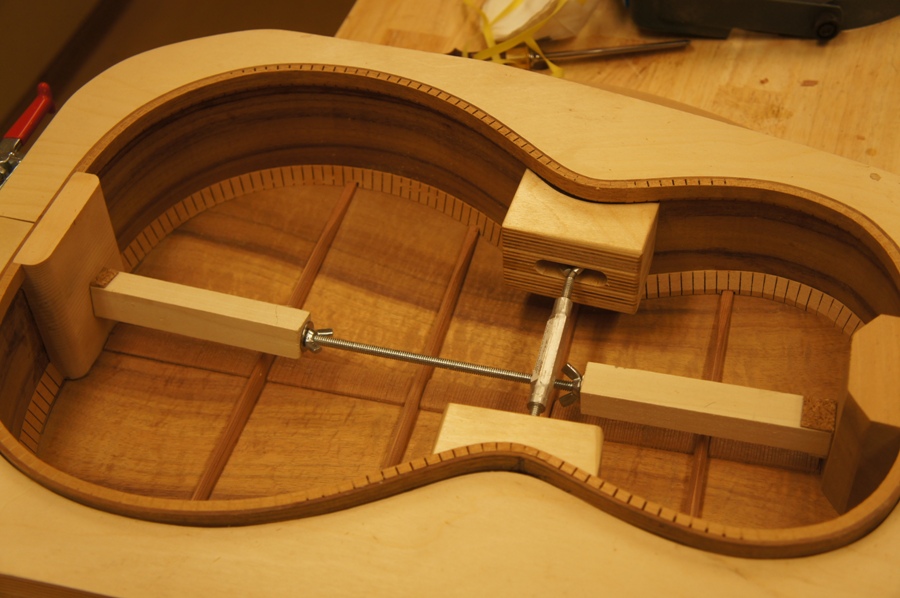
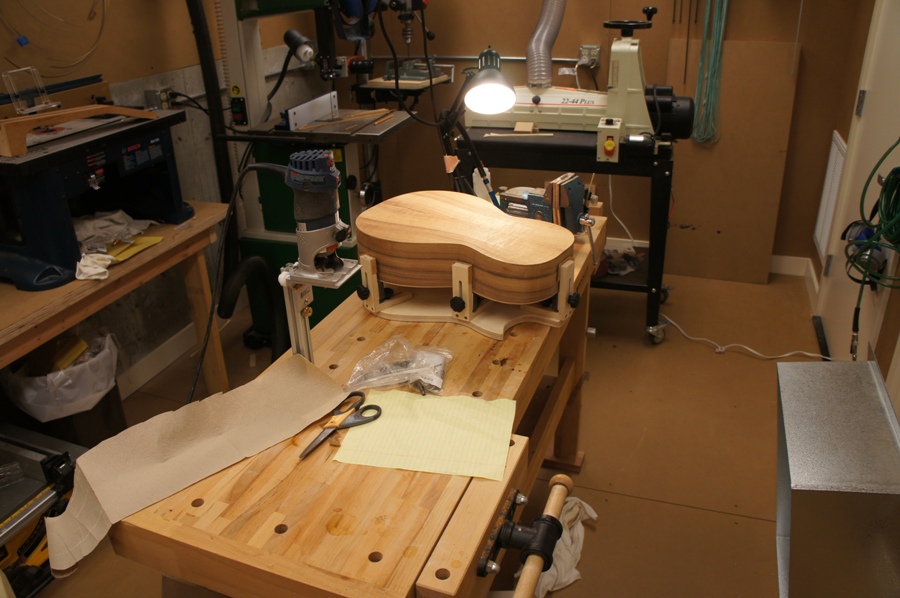
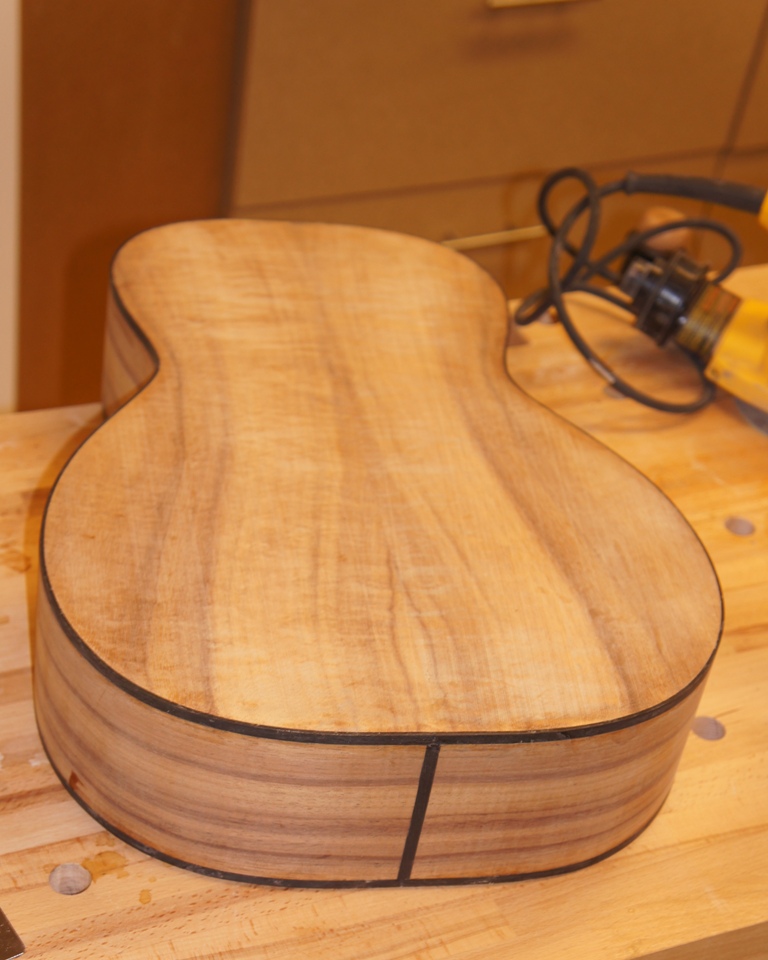
December 4th, 2011
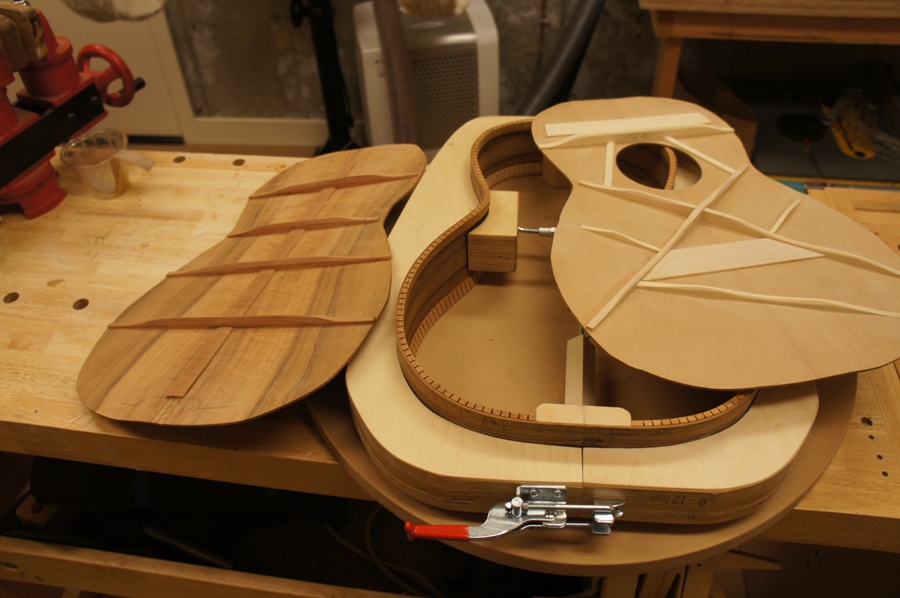
Nearly ready to close the box. I have the back fit into the body and the top is finished. I marked out where I need to cut the rebates for the top braces. I used my mini die grinder from Blues Creek to cut the rebates — for the first time ever the back fit in one try after I marked, cut the rebates, and trimmed the braces.
First time the back fit perfectly in one try — a milestone!
✦
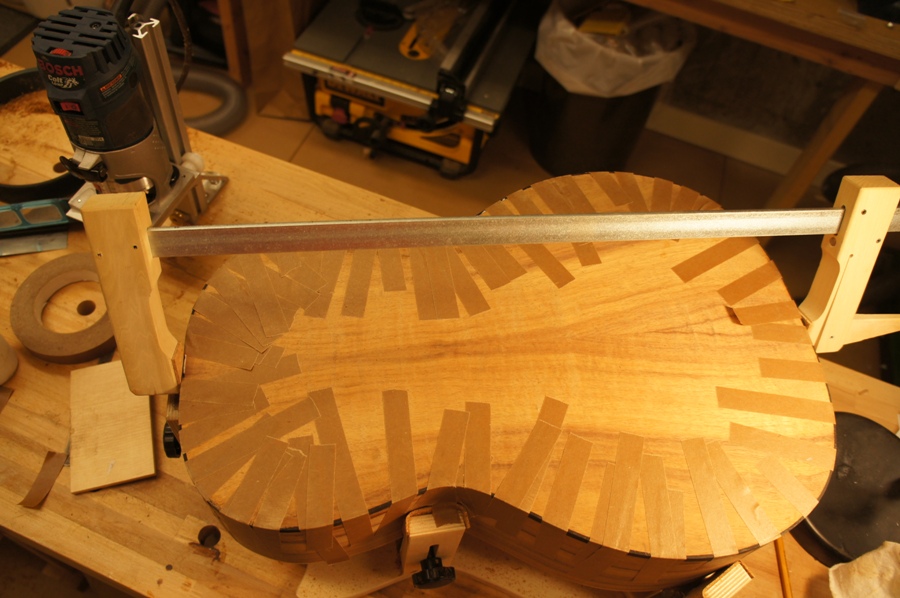
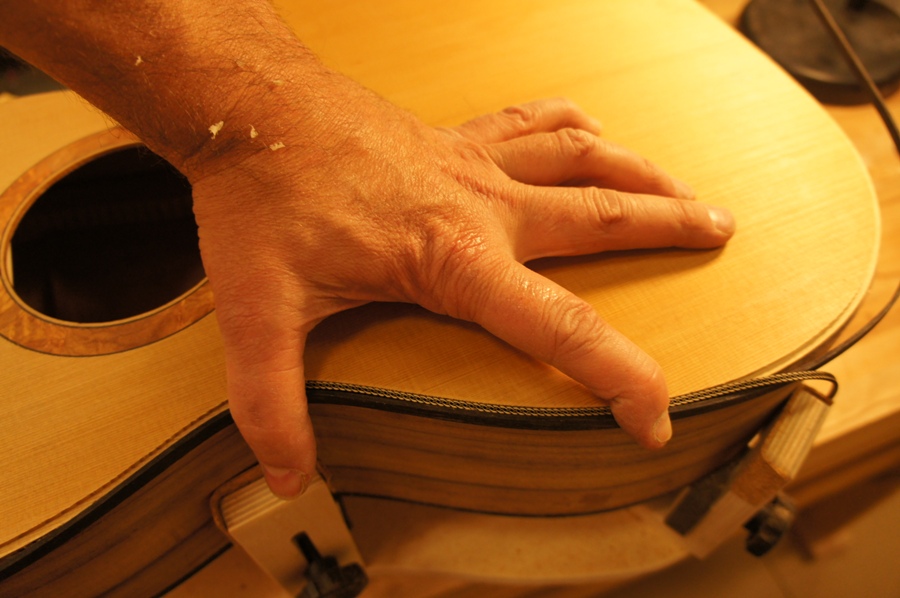
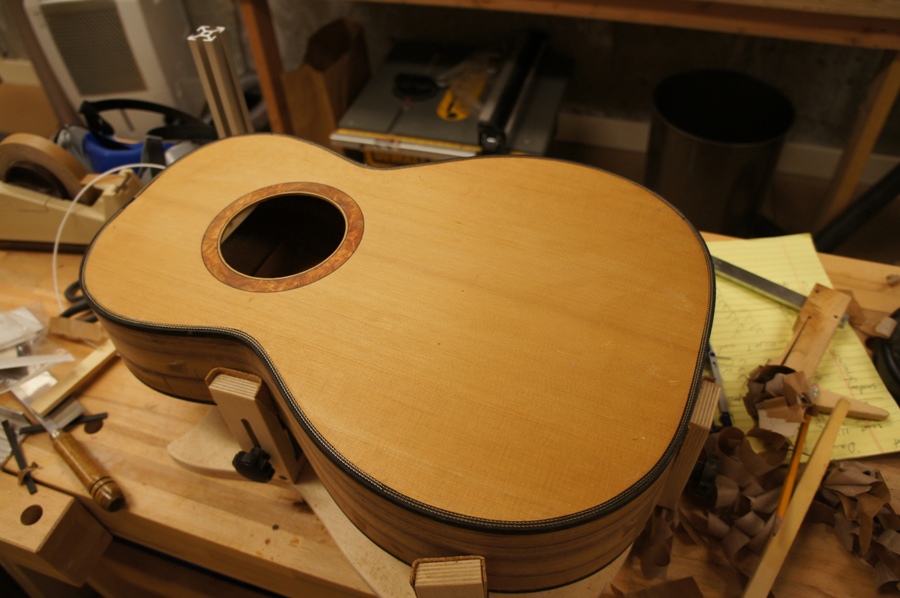
December 8th, 2011 — Top Glue-Up
I glued on the top last night. Checking the geometry first, I found that the rims had more of a top-to-bottom bow than I wanted — if I had glued it up that way I would have struggled the rest of the build to compensate. I took the body back to the radius disk and sanded down the waist a bit, deepened the rebates for the braces, then rechecked the geometry. After glue-up using a straightedge I have a gap of 2.5mm at the bridge saddle location — exactly the number I was shooting for.
2.5mm gap at the bridge saddle — exactly right
✦
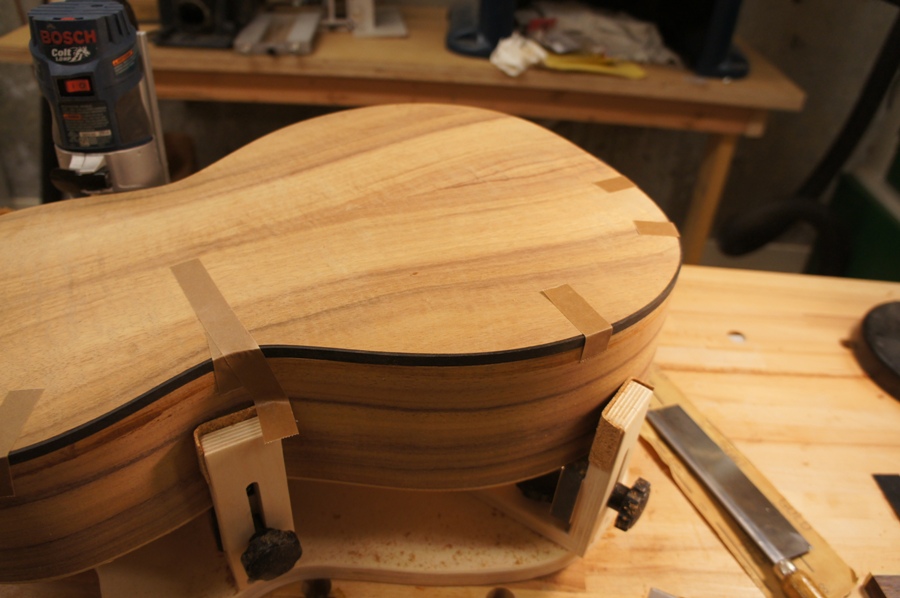
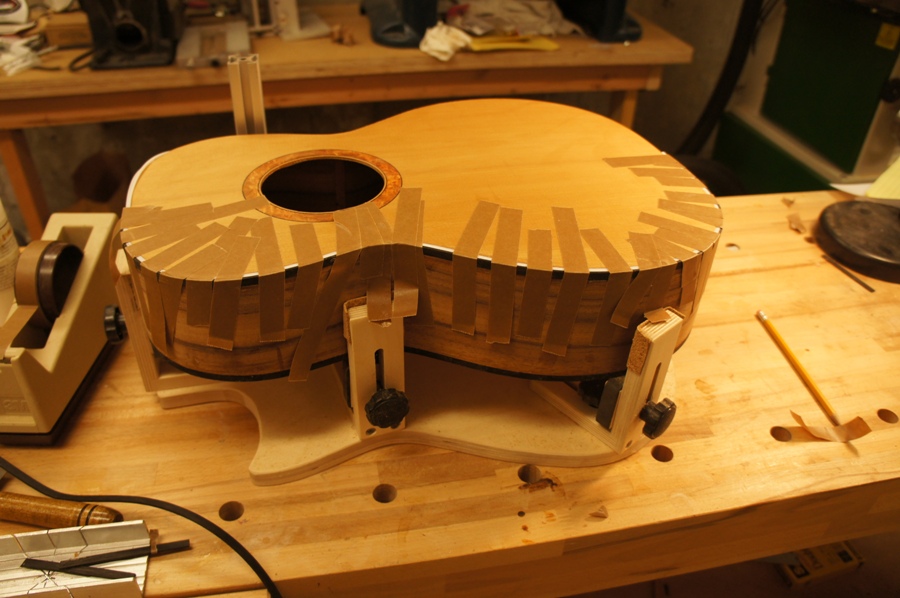
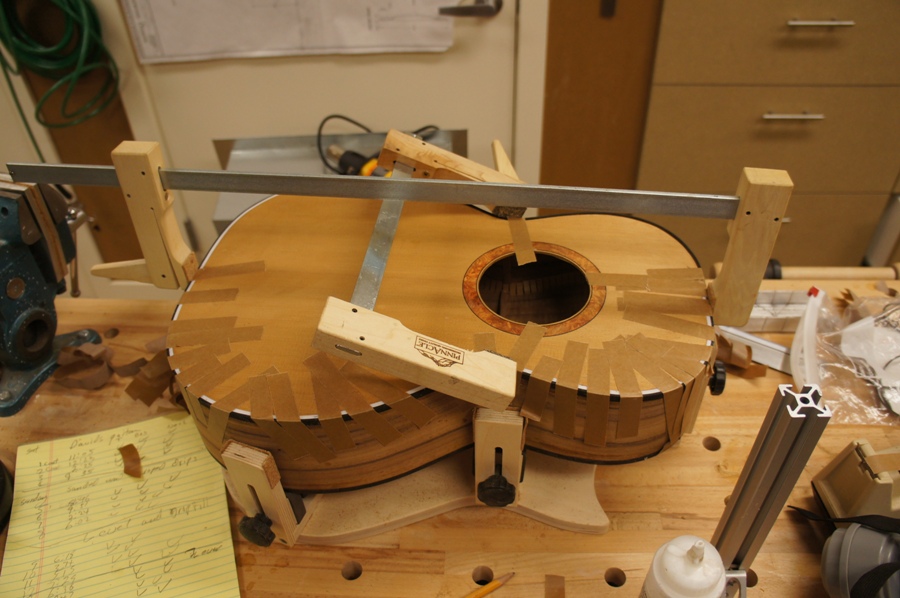
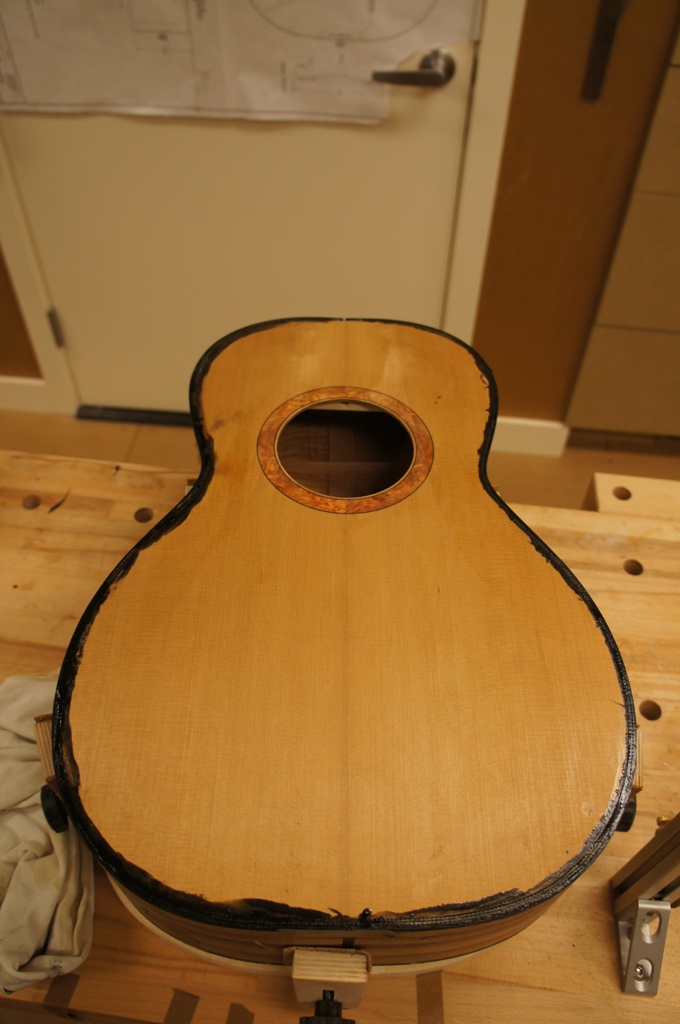
December 8th, 2011 — Binding
I made it through the scary parts — routing out the binding and purfling rebates. I'm excited about the binding as it's setting perfectly flush on the side and top. On the top I'm using Purflex (from the makers of Zipflex) — it looks like a laser-cut pattern in wood glued into a rubber base. The back uses just ebony bindings. I glued up the top bindings with two thin Teflon strips that matched the purflex dimensions.
Purflex sitting in the rebates — to be glued the following day
✦
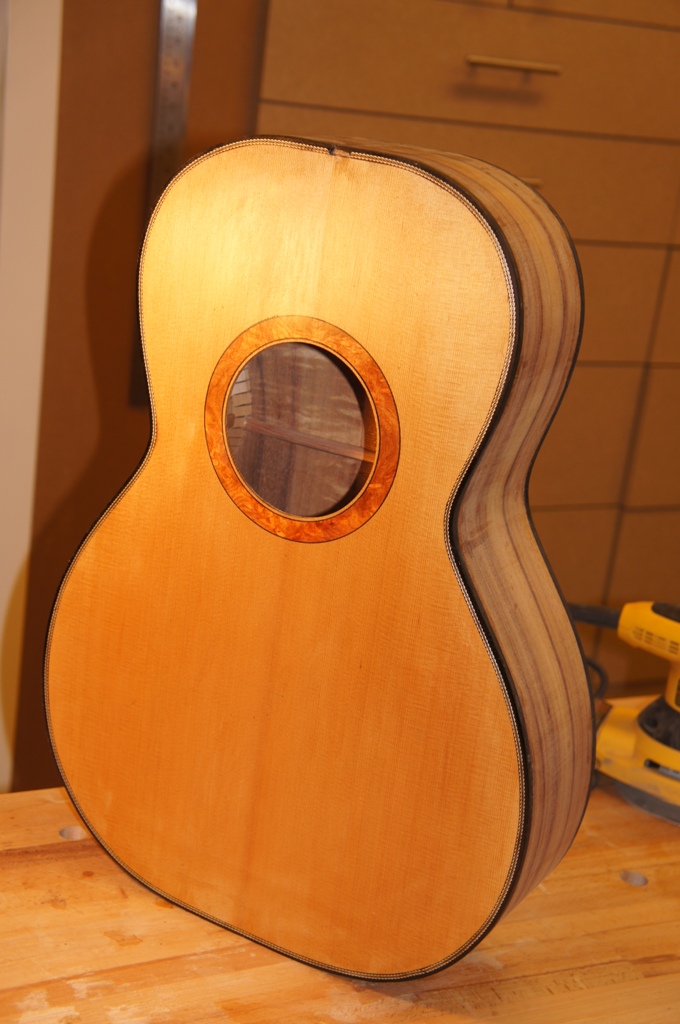
December 11th, 2011
After destroying a top at this stage with Purflex when using it for the rosette, I have to say I was nervous. Less so this time since I had shellac on the top and the purflex — I also tried it on the portion covered by the fretboard first. All came out OK. I mostly used a scraper to clean everything up.
The shellac saved it — Purflex came out beautifully this time
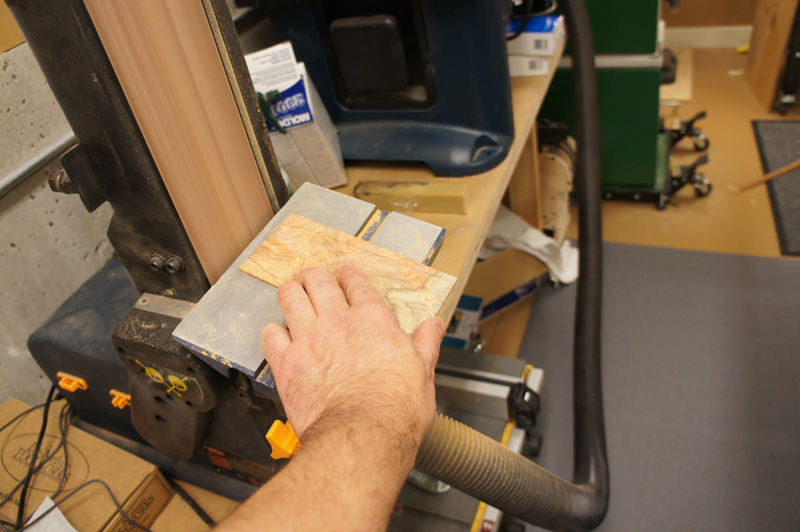
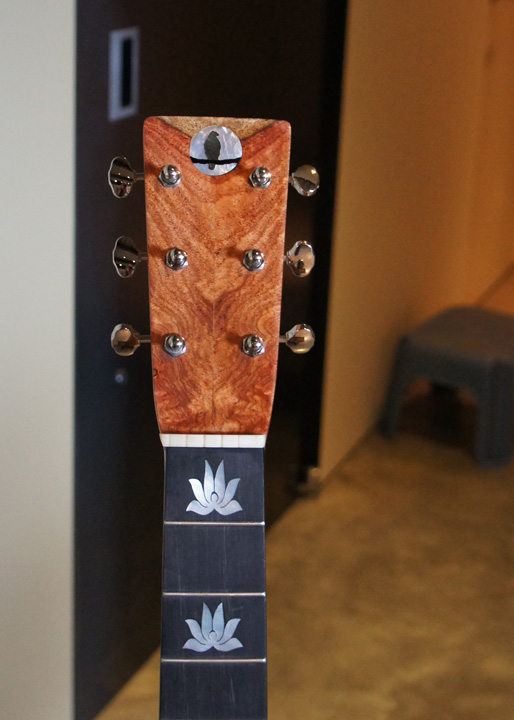
I resawed a couple of veneers from my block of Amboyna Burl for the headstock — thanks to my new Carter's bandsaw bearing upgrade kit I was able to cut out cleanly cut veneers. One way had a lot of the Amboyna swirls but looked too wild, the other has nice sapwood color — I'm going that way.
✦
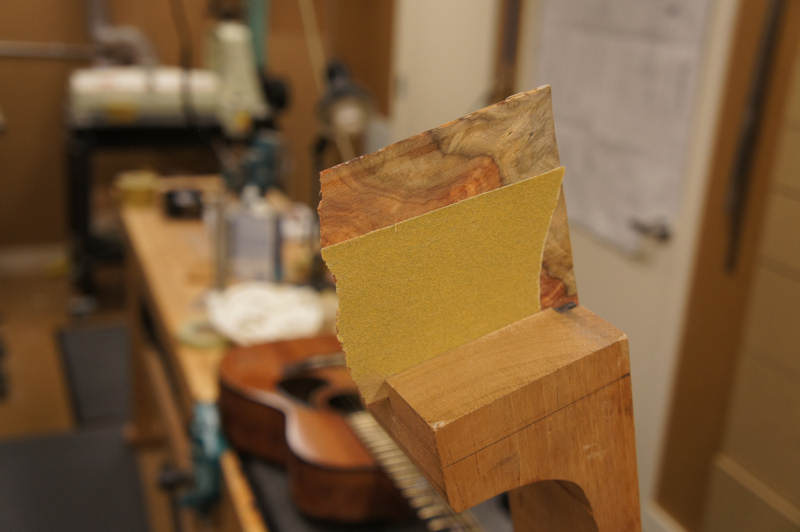
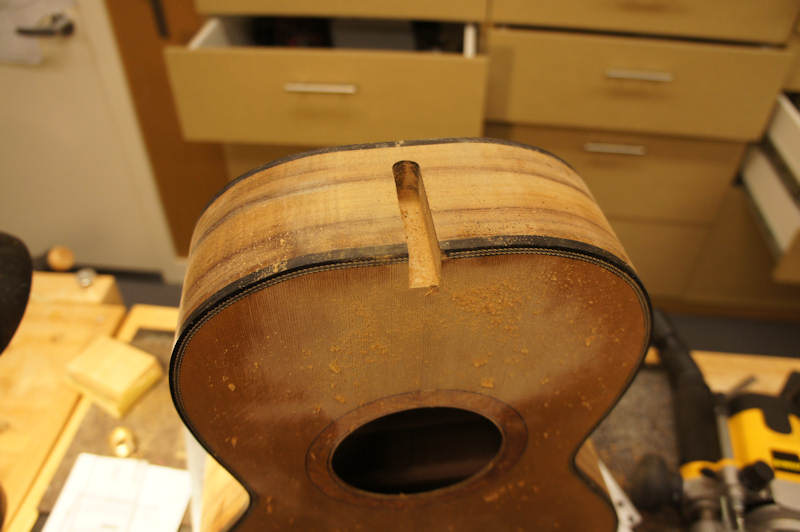
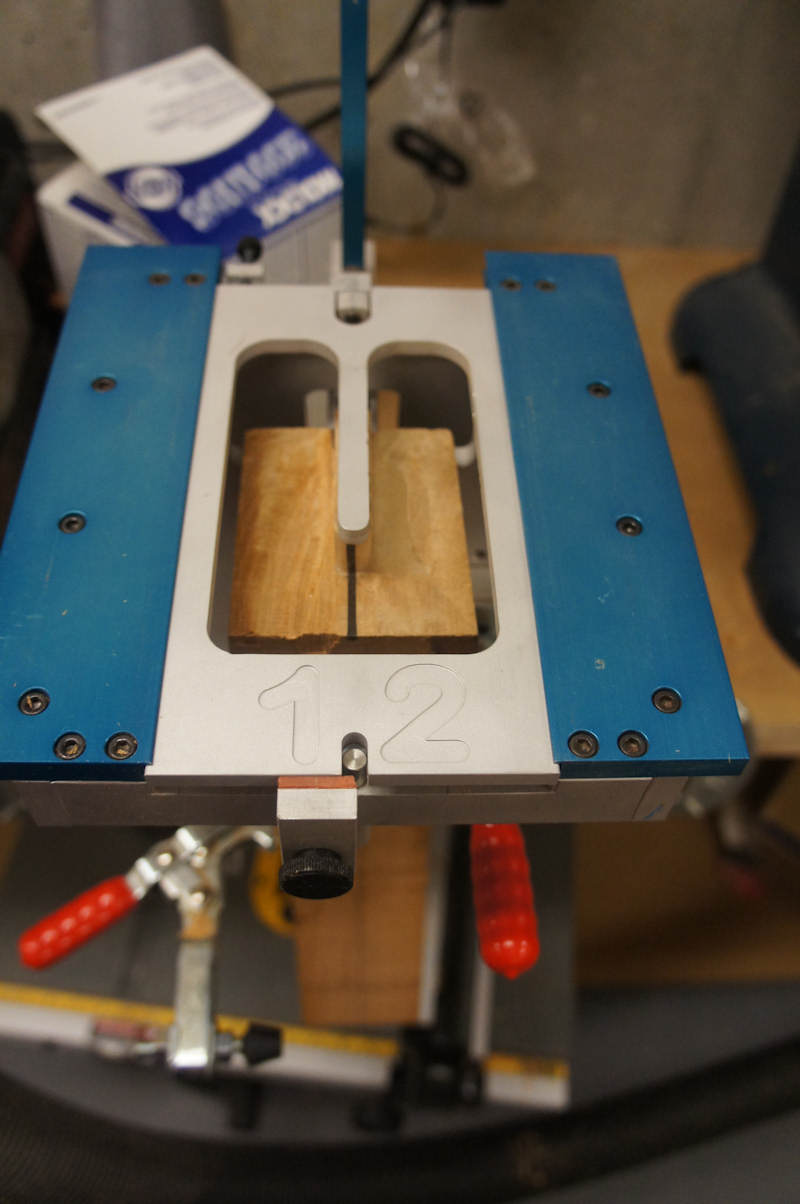
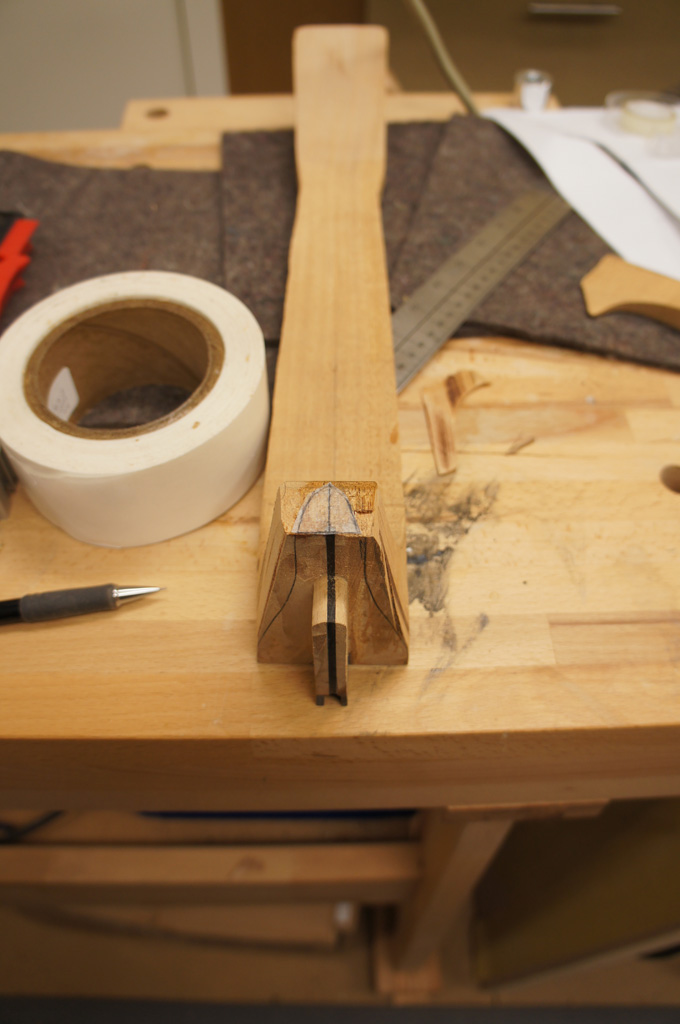
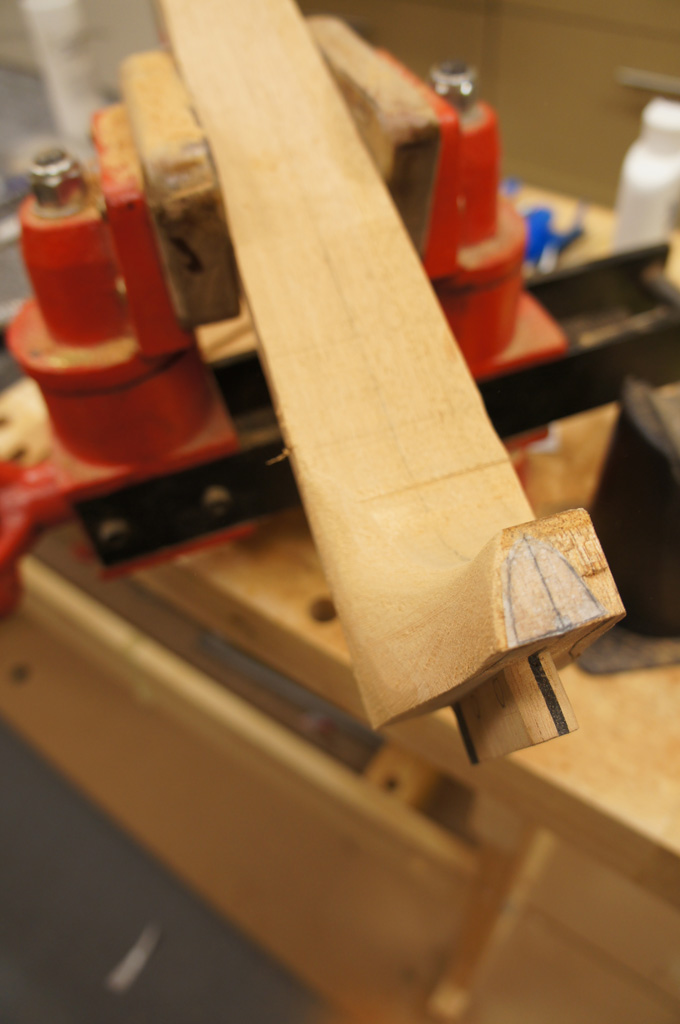
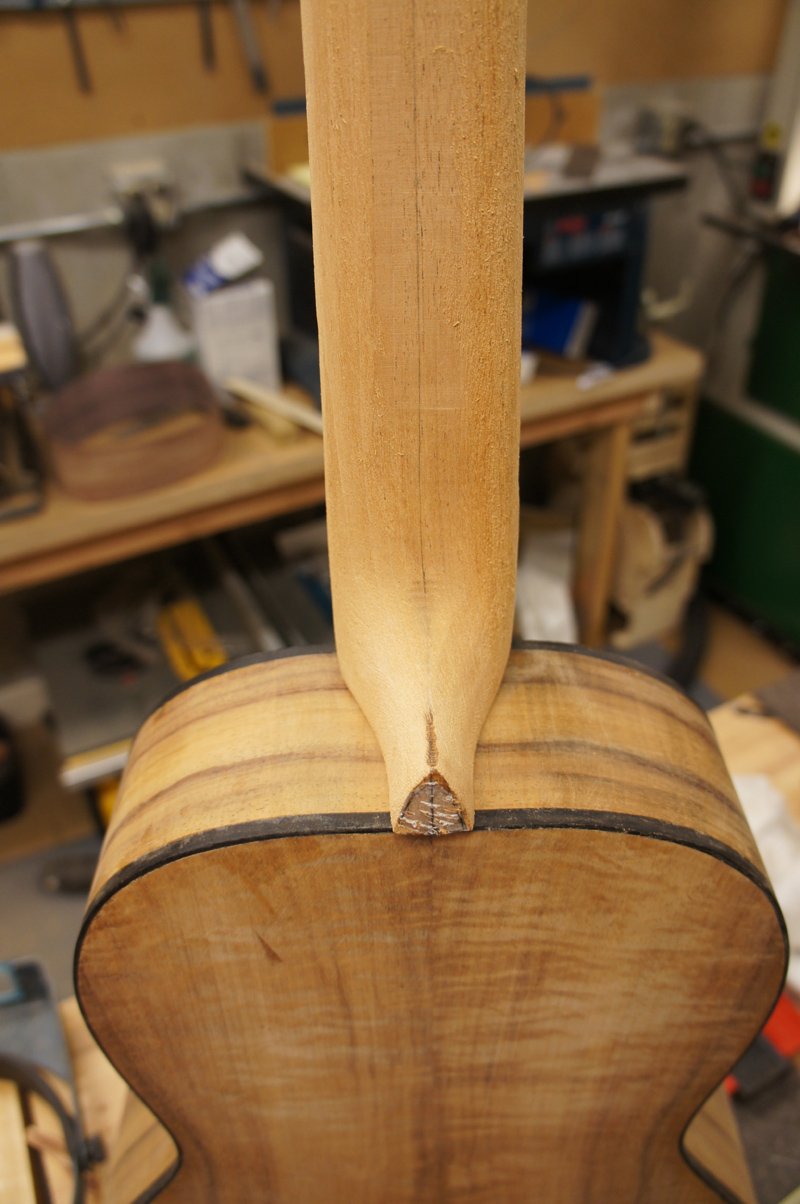
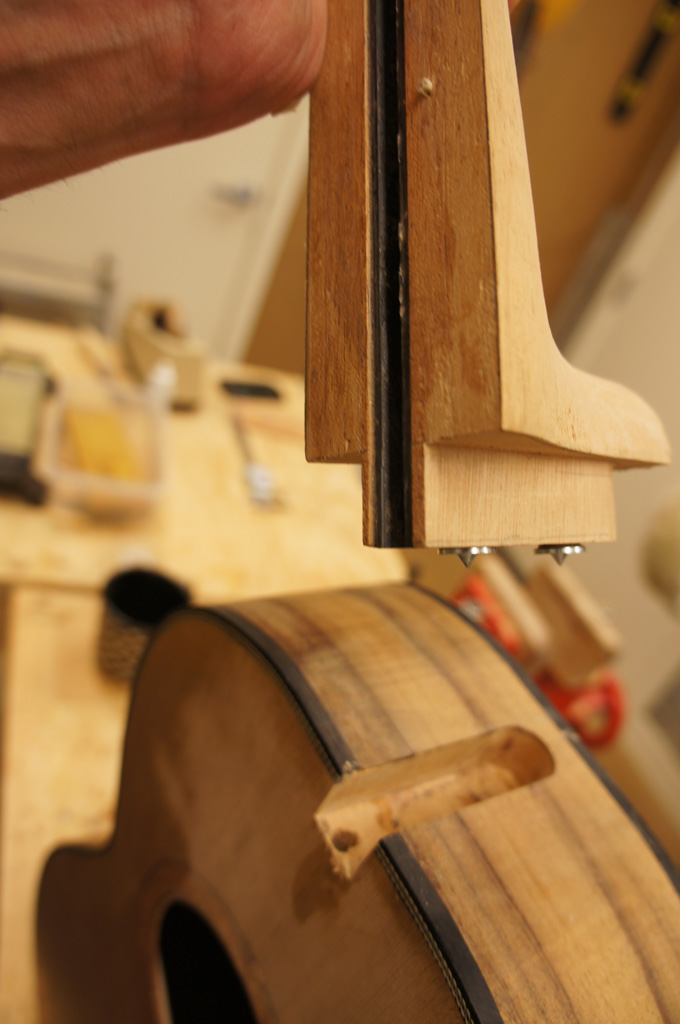
December 27th, 2011 — Neck Tenon & Mortise
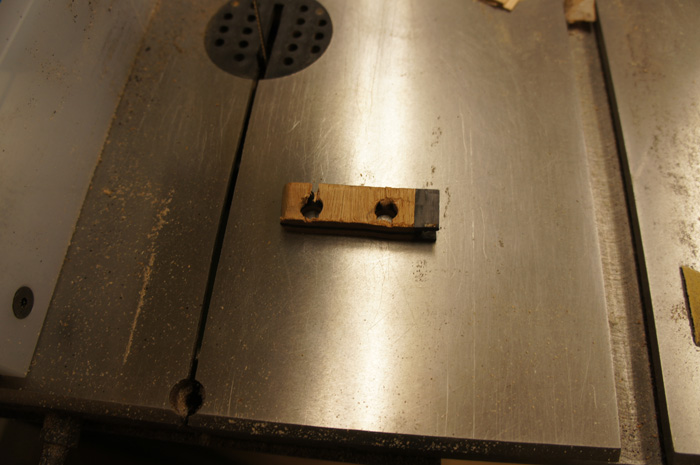
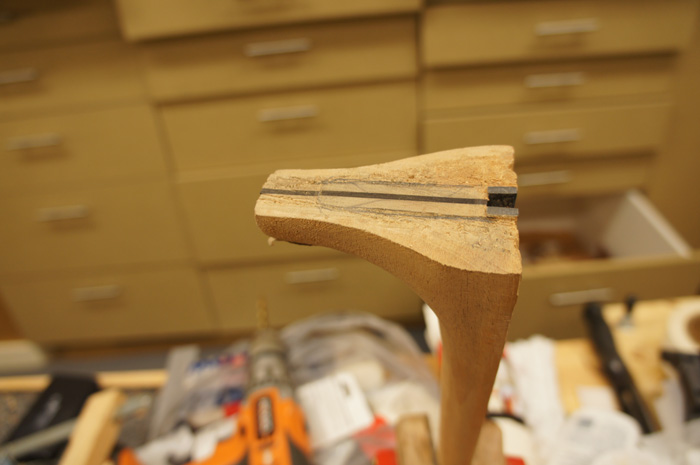
With the body closed and my brother's guitar ready for shipment I'm ready to get back to the neck. On my last parlor guitar I had a 3/4" tenon and bolt-on brass inserts — to my eye it forced a stubbier looking heel. On this guitar I'm going with a ½" tenon and switching to barrel nuts like Rick showed me. With that switch I decided to reinforce the tenon with an ebony insert running cross-grain to the neck — basically making plywood.
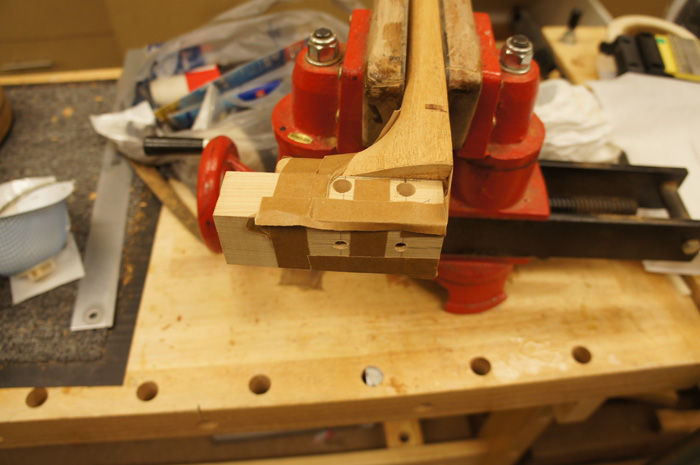
I used my Woolson-style neck jig to cut the tenon and route the mortise. The jig clamps the neck on a tilting plane — you can place the body on the jig and set the neck angle to match. The tool has a centering template and changeable inserts. I used a plunge router to cleanly route the mortise. Checking the neck angle after the route I had exactly the angle I was looking for.
✦
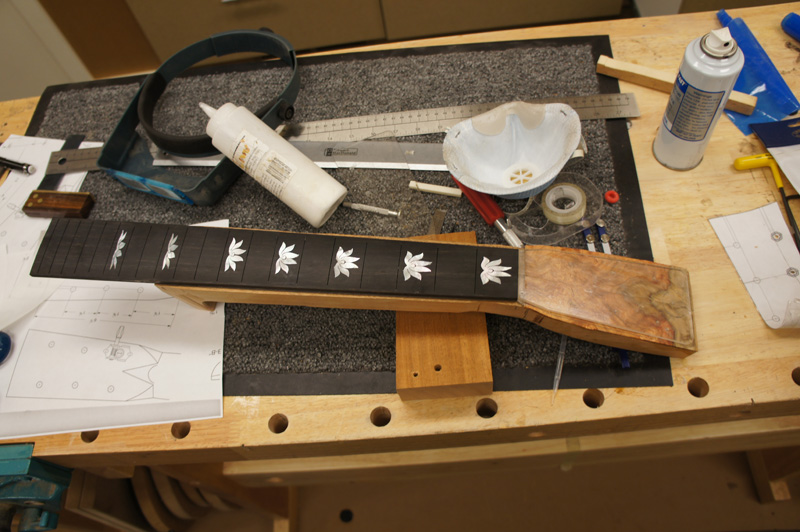
December 27th, 2011 — Fingerboard
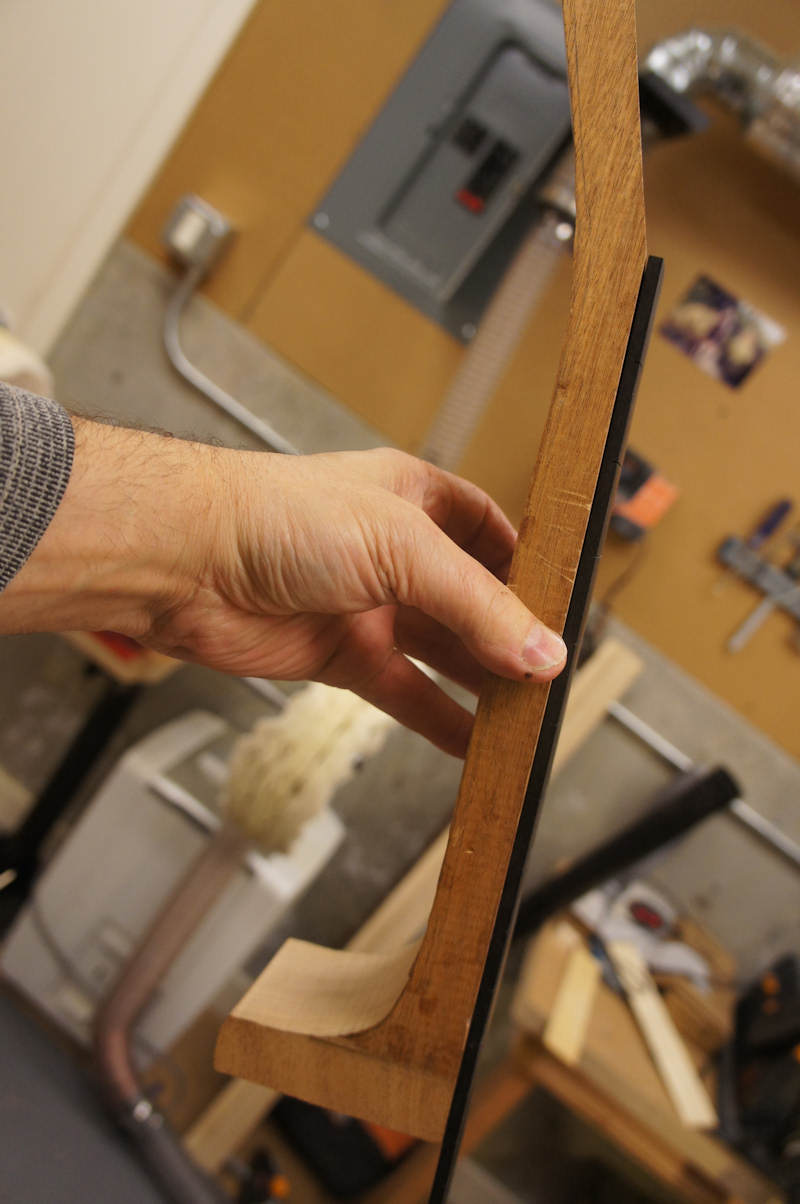
I'm off for another 5 days so there are a lot of posts — I'm basically a type-A personality, plus my wife has all three of her sisters at the house and the shop is a bit of a refuge. I completed my fingerboard indexing system using a neck template from Waldron Instruments that had a nice center line and nut line. Two quick 1/8" holes and I had a template.
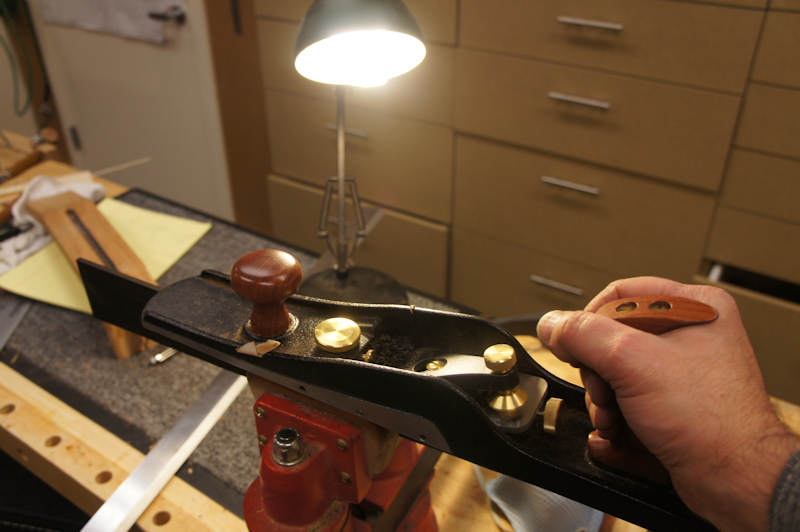
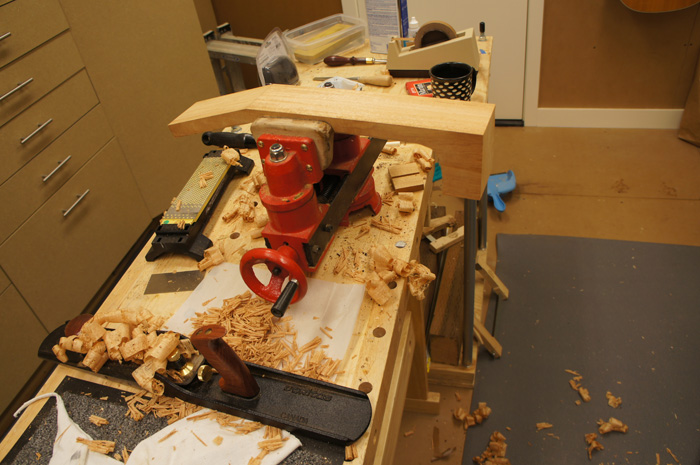
I laid out the fingerboard size to include .080" ebony binding on each side. I cut on the outside lines and used my jointer plane to take the fingerboard to its final dimensions. I laid some wax paper on my bench, supported the binding against brace wood clamped with bench dogs, and used hand pressure while dotting the joint with CA. With both bindings tacked on I flooded the joint.
✦
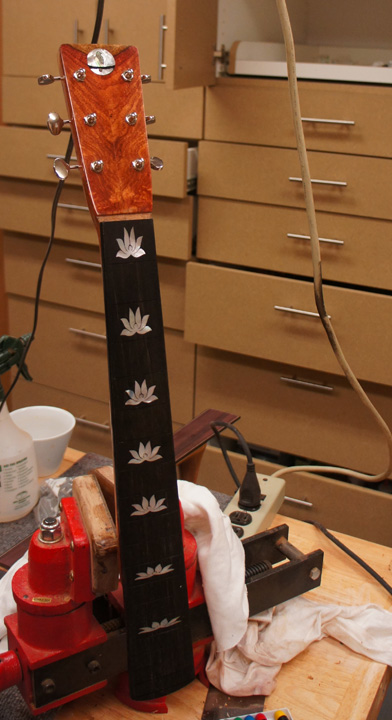
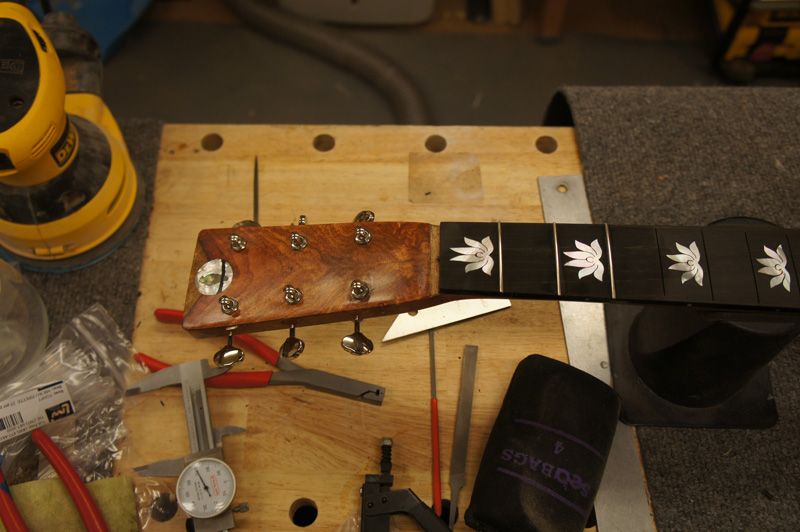
December 29th, 2011
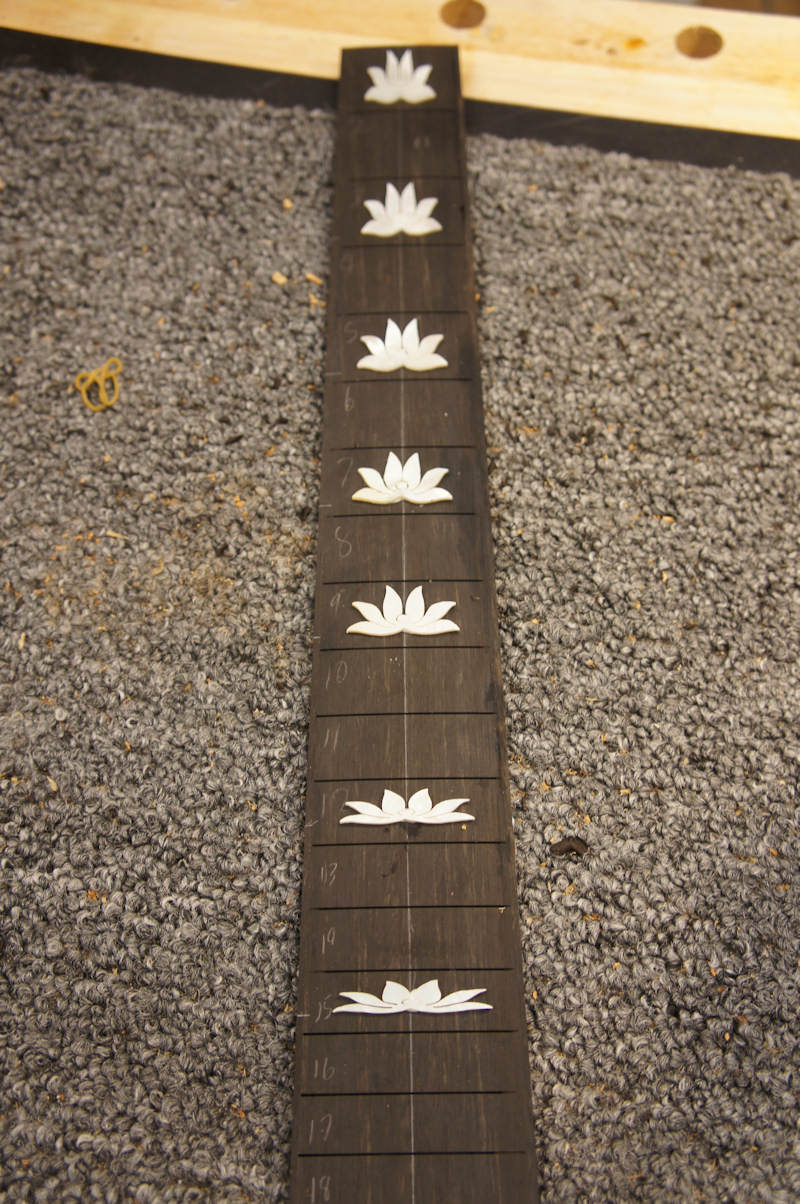
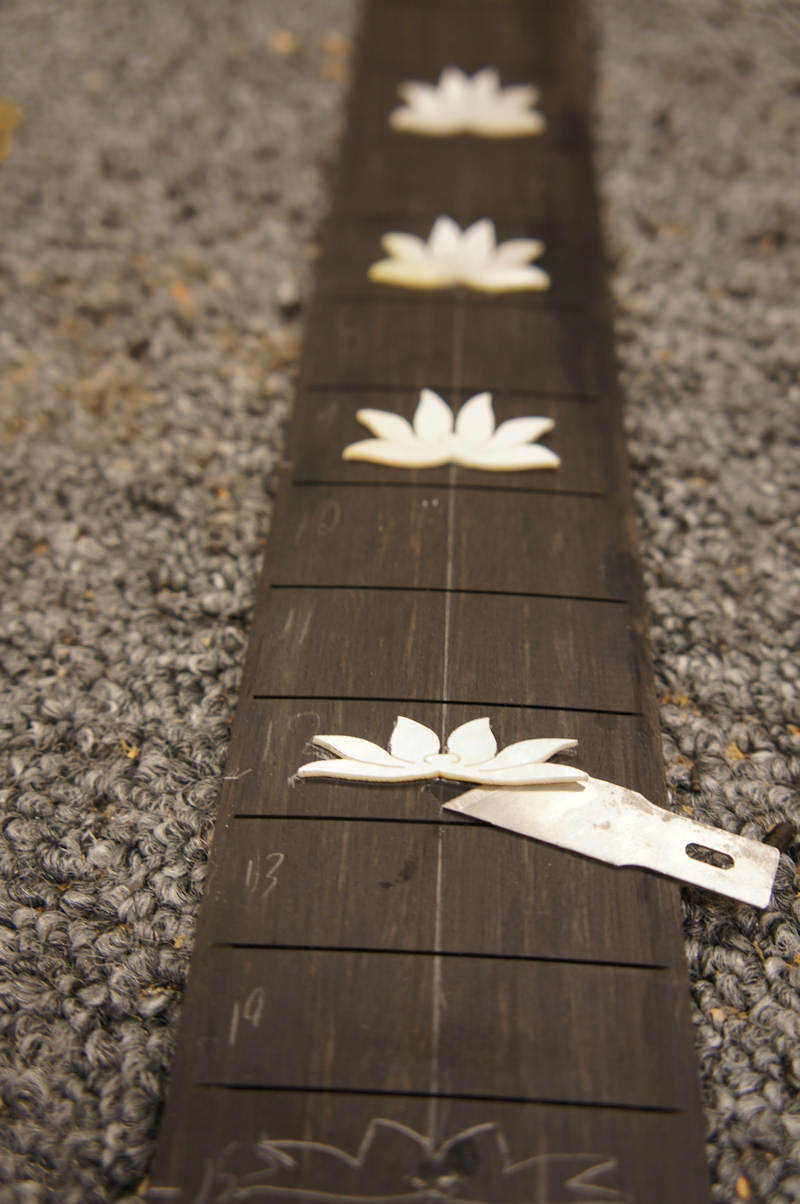
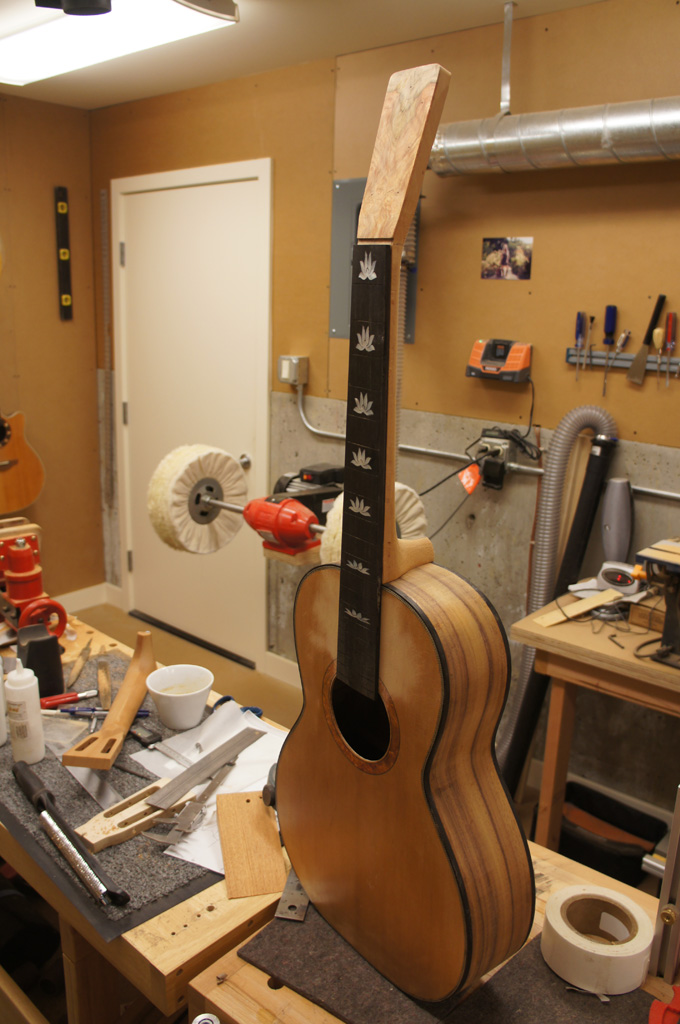
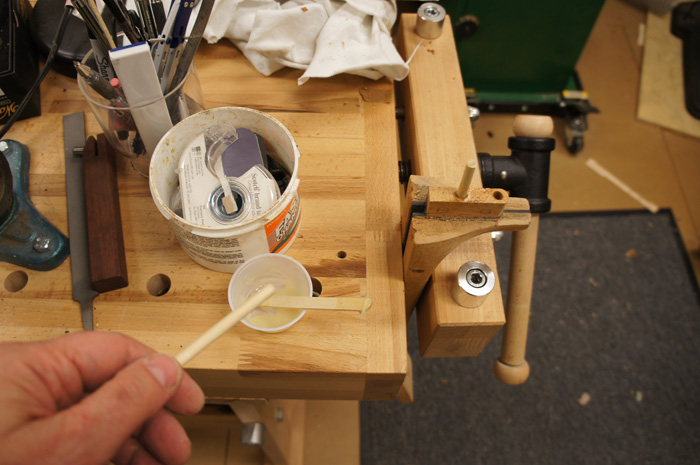
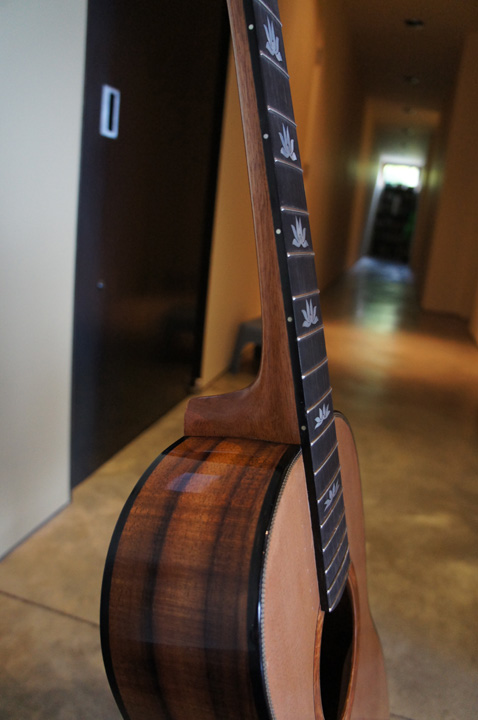
I got the fingerboard inlays installed — it went pretty well. Working in ebony is forgiving with the margins. I use LMI white glue — just a dab — to hold the inlays down while tracing the pattern with a 0.05mm lead pencil, letting it set ten minutes then carefully popping them off with an X-Acto blade. I tried two routing procedures: tracing the outline with a very small end mill then bulk removal with a larger one, versus bulk removal first followed by detail work. I'm leaning toward bulk first then detail.
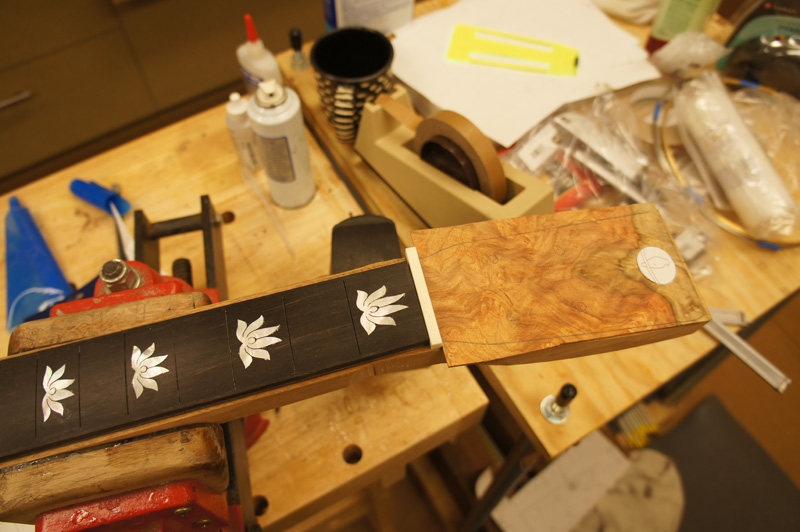
Still trying to figure out which headstock veneer to use from the two I cut.
✦
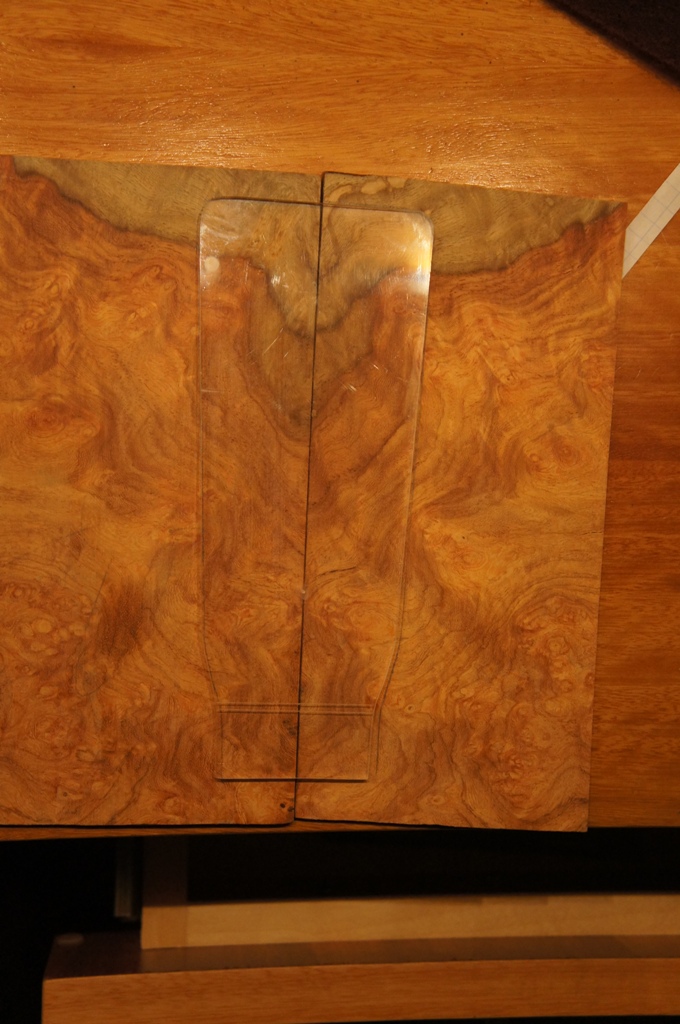
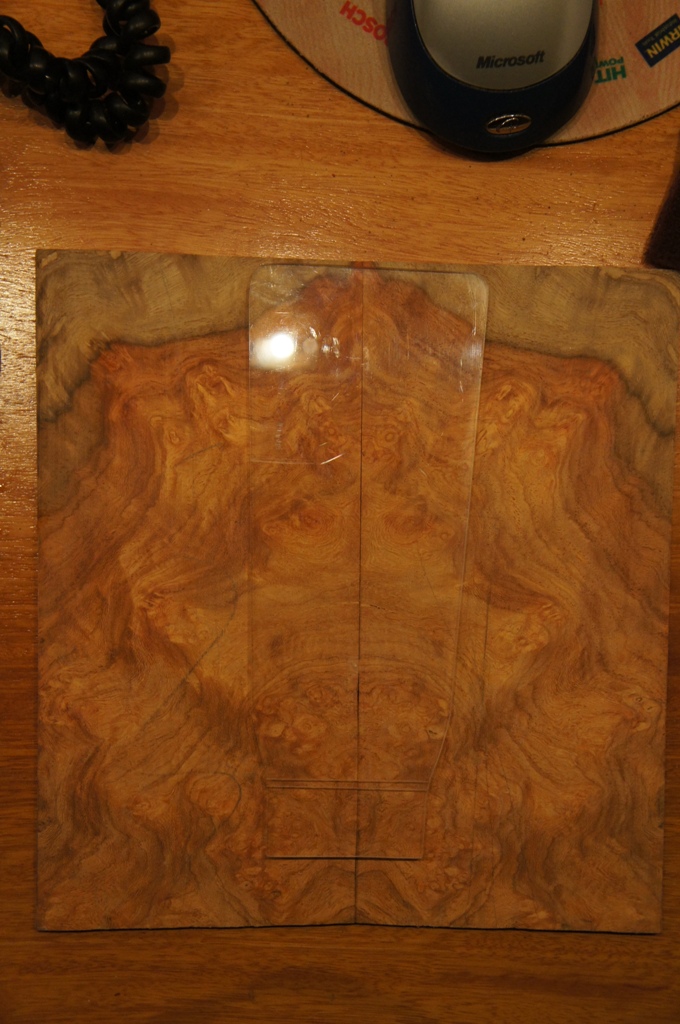
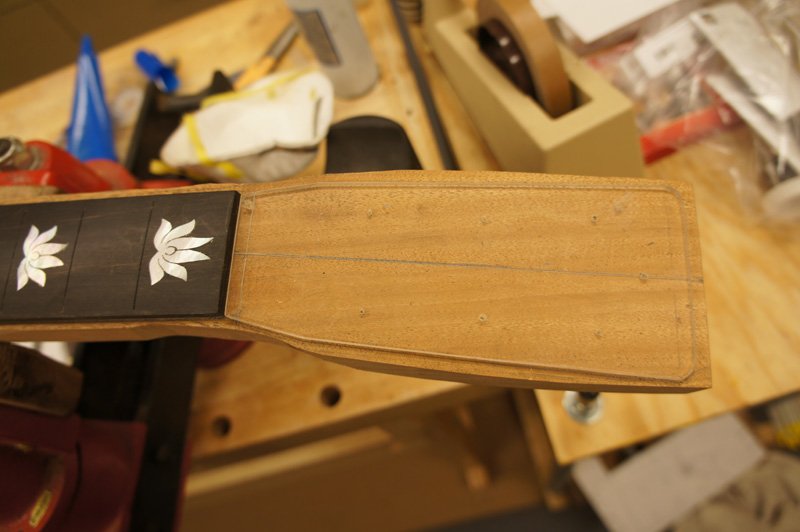
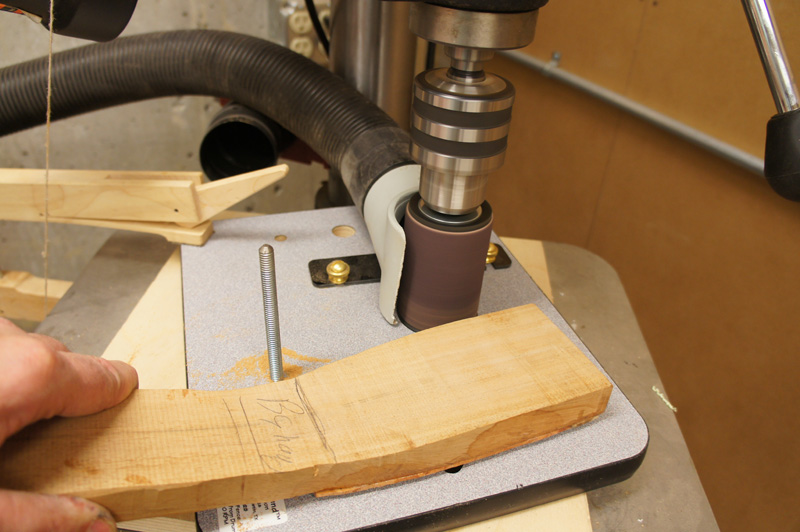
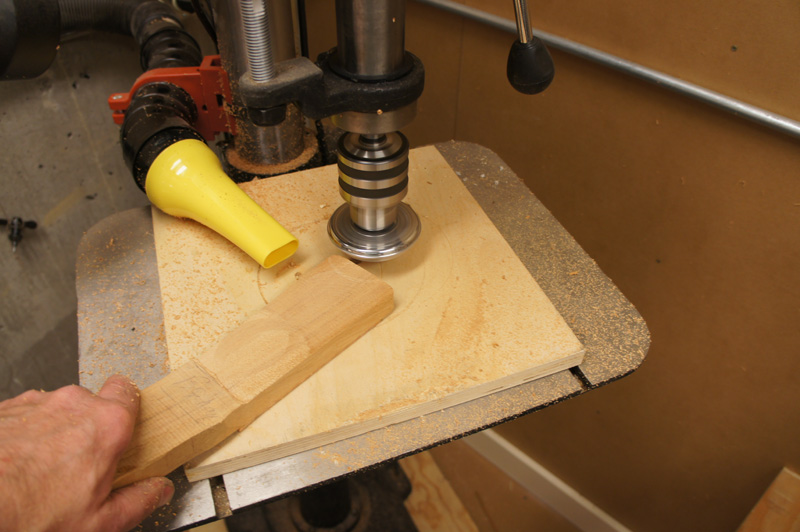
January 2nd, 2012
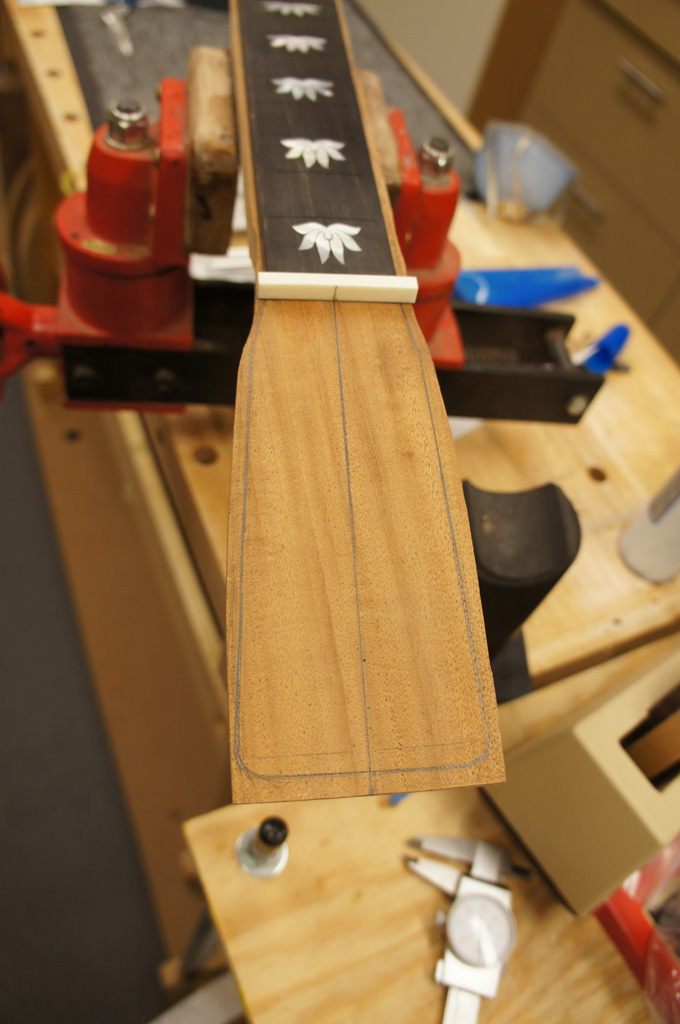
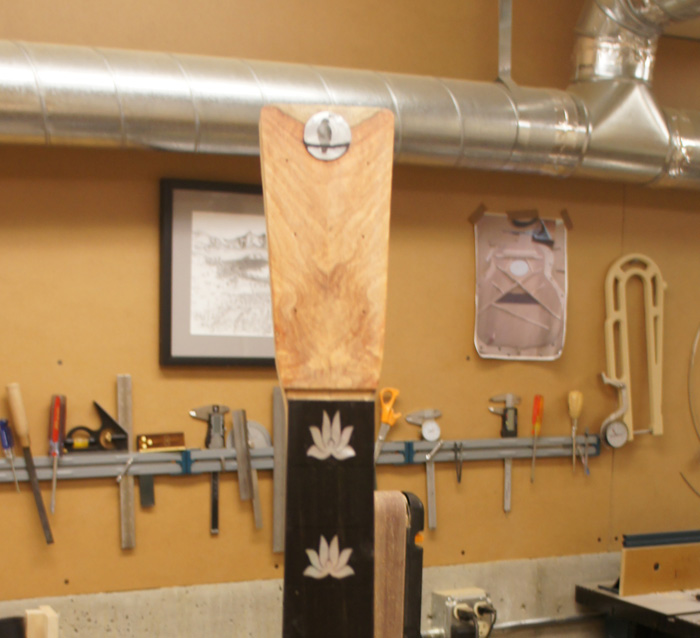
This amounts to a couple of days of work with a bunch of pictures — nearly finishing the neck. I made a headstock template out of plexiglass with holes for the tuners and my logo. I used the template to decide where to cut the nut end of the headstock veneer, marked it, and used the belt sander to sand in the headstock angle.
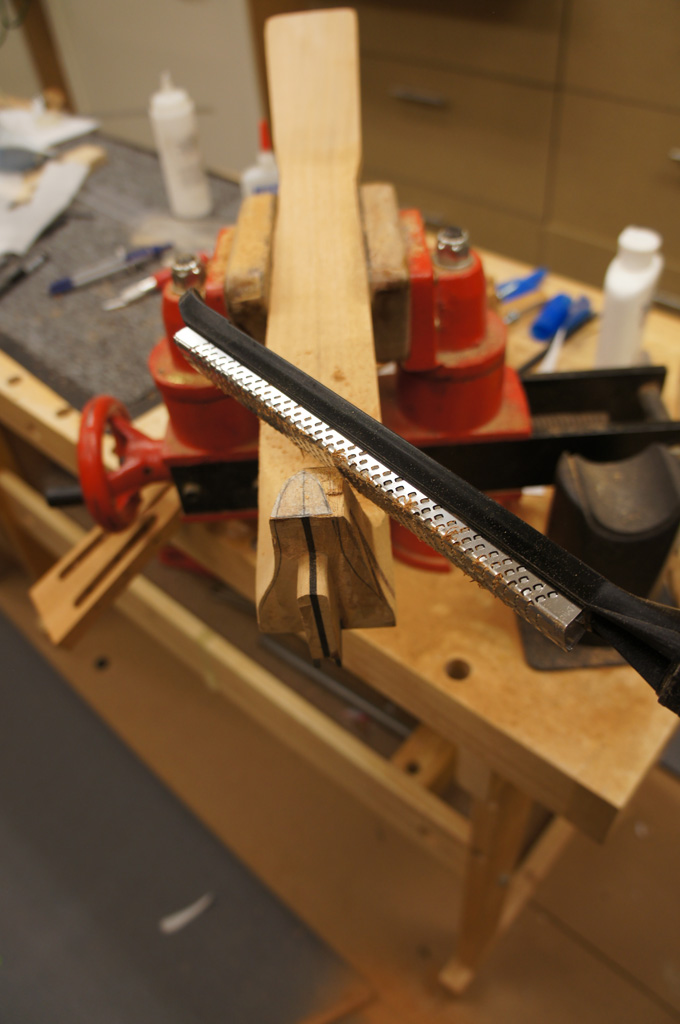
I took the desired width at the fingerboard and heel, made a half pattern, transferred it to plexiglass then to the bottom of the neck heel. I free-hand drew a heel cap shape and glued it on. I use long sweeping strokes with the rasp or microplane — if I keep the approach to the center line and the profile even, the heel carves to a natural curve.
✦
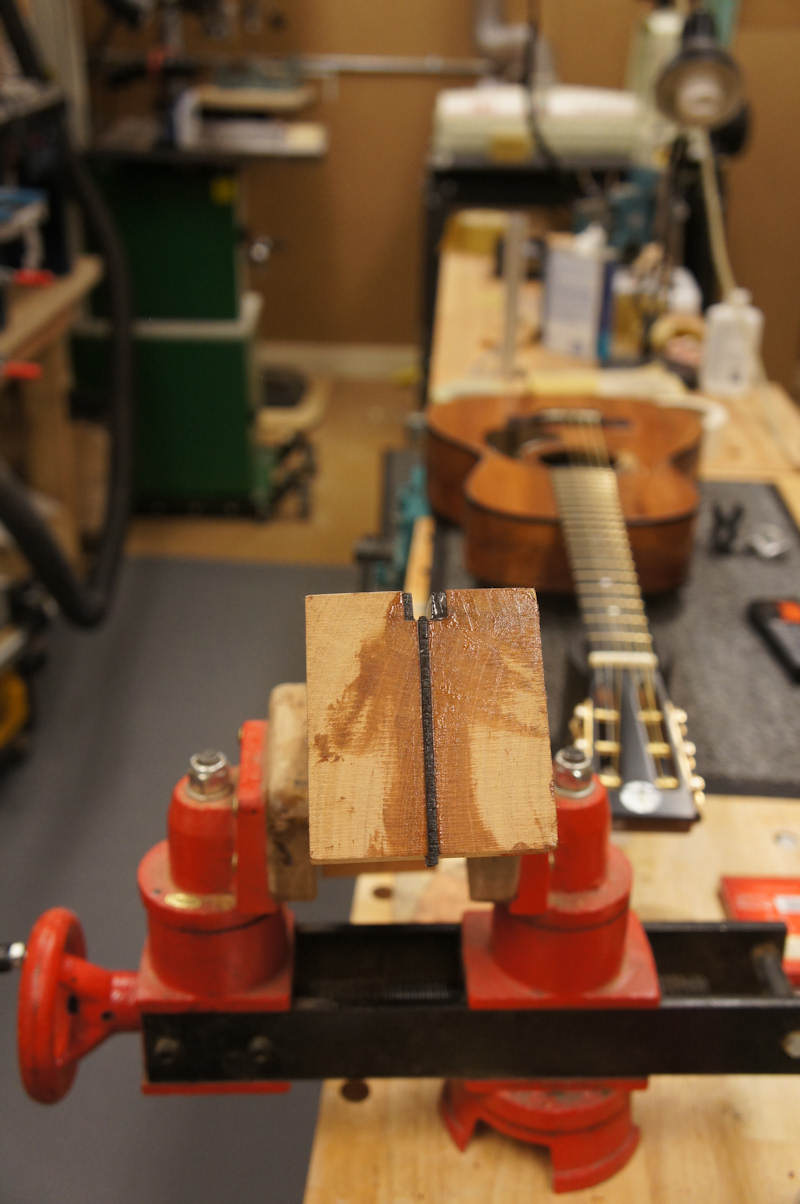
January 17th, 2012
The guitar was nearing completion. I found the correct size barrel/cross dowel nut and bolt and made a template to drill the holes in the tenon. If only I had tested the jig and noticed that I went off center slightly when I routed the channel...
Hard Lesson
I drilled right through the side of the tenon. My first thought was I can fix this — so I cut off the tenon and epoxied on a new tenon with 1/8" dowels for support. It worked, but I got to thinking that I'd hit my error budget on that neck and decided to just make a new one, chalking the first up to experience and practice.
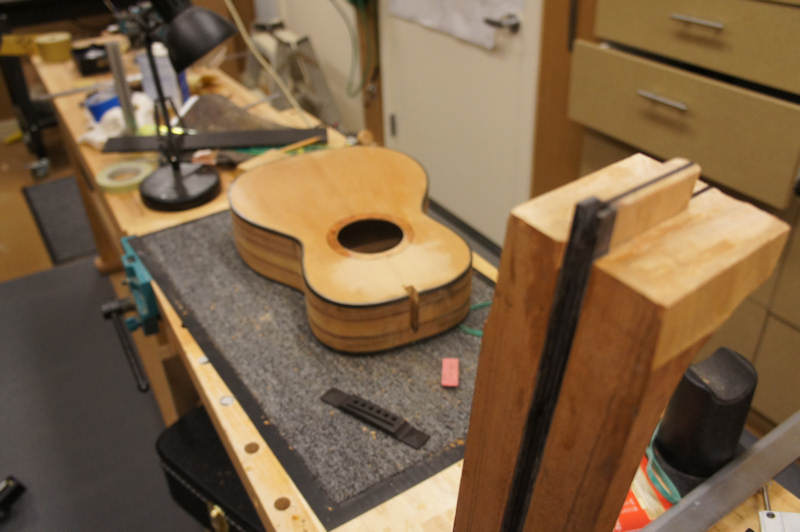
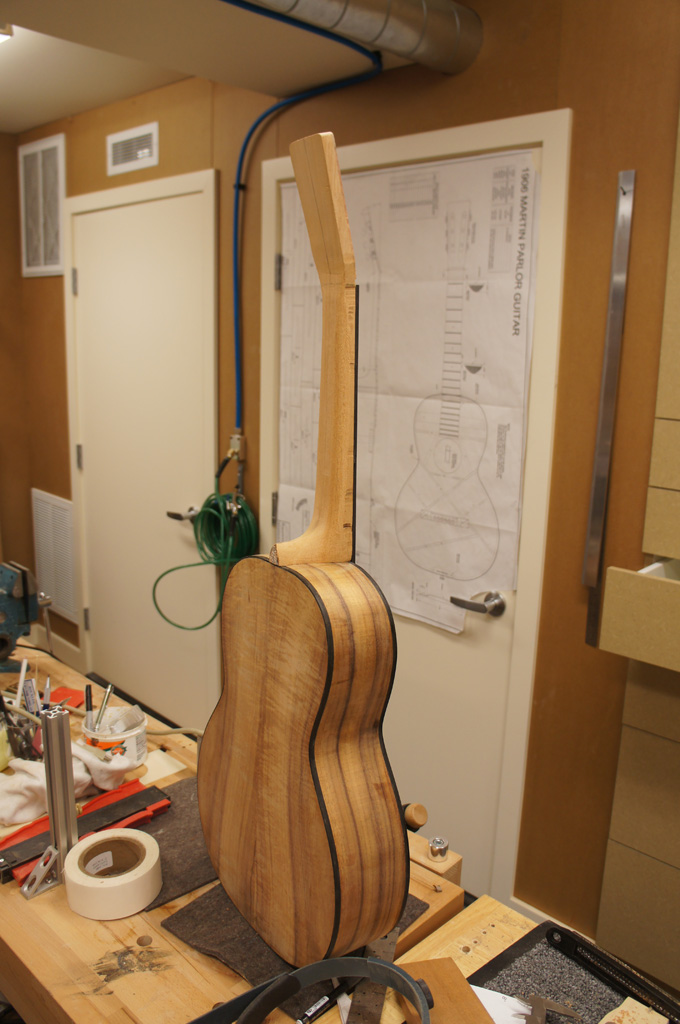
I cut out a new blank and started the process again. I switched from a ½" tenon back to a ¾" wide tenon, but carefully laid out the heel shape to get the classic look with the narrow long tail. The new neck, while it still needs cleanup after gluing on the fretboard, is by far my best yet.
✦
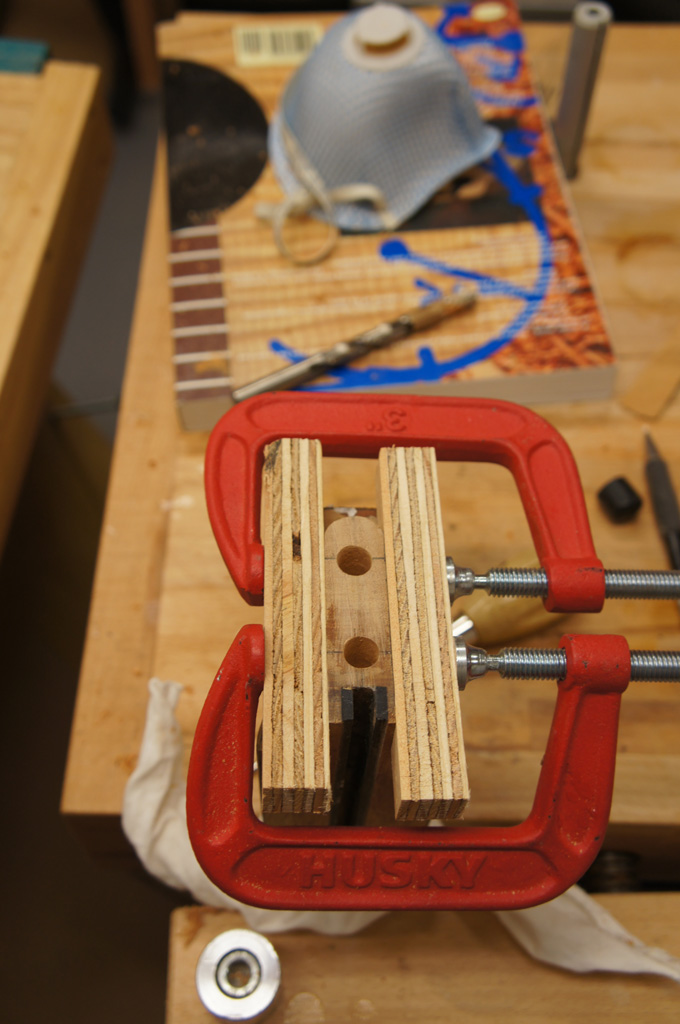
January 19th, 2012
To prevent splitting out another tenon I clamped ¾" plywood strips to support the tenon through the whole process. Before inserting the brass inserts I put in some hole centers and drove them into the neck block to make an indent, then pencil-marked the indents to make them visible.
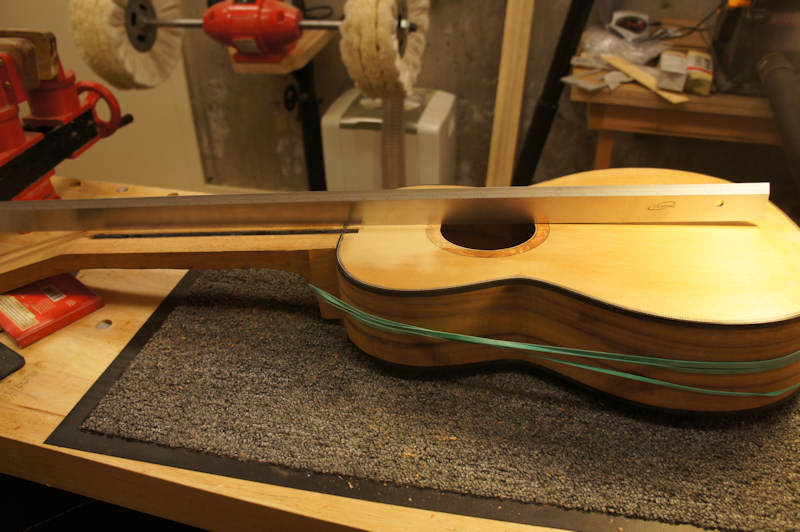
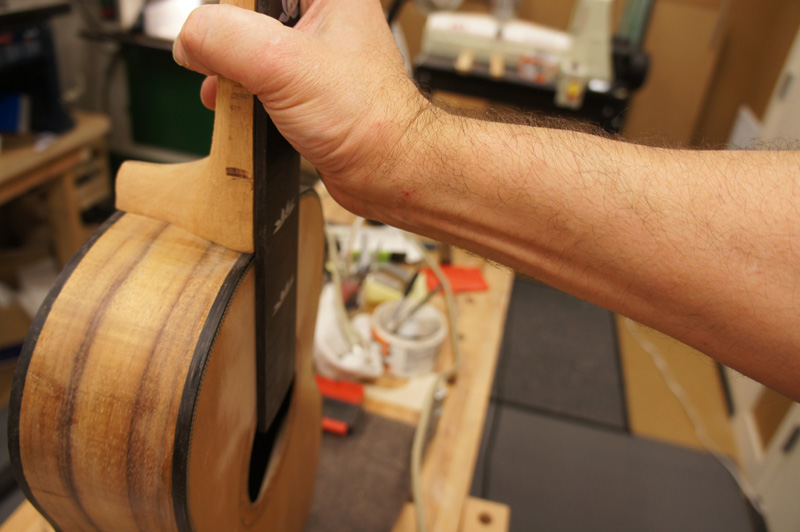
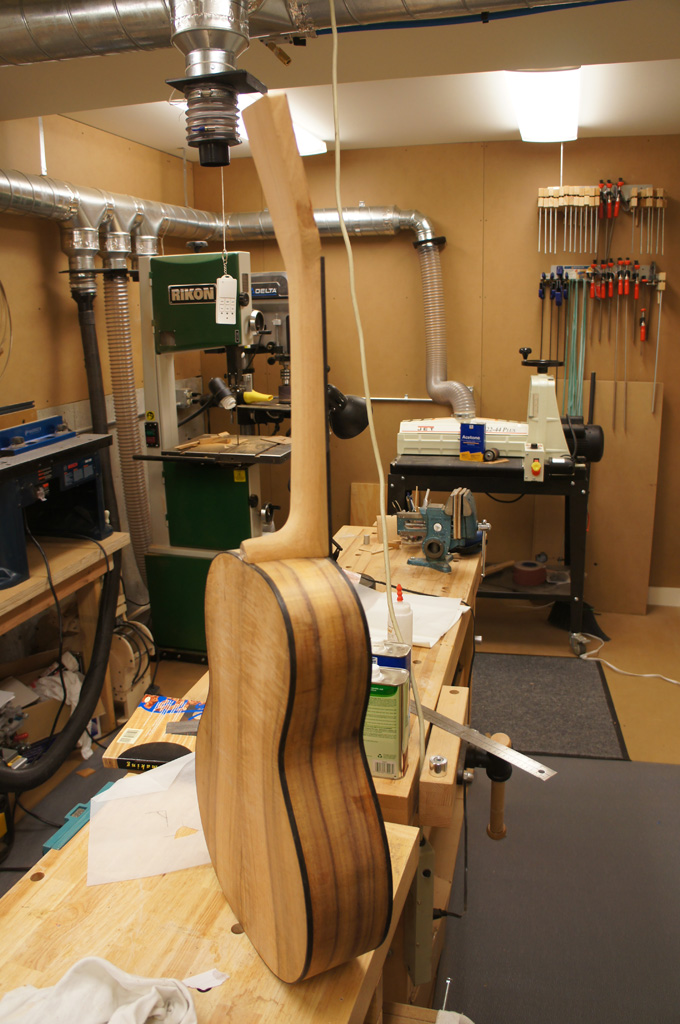
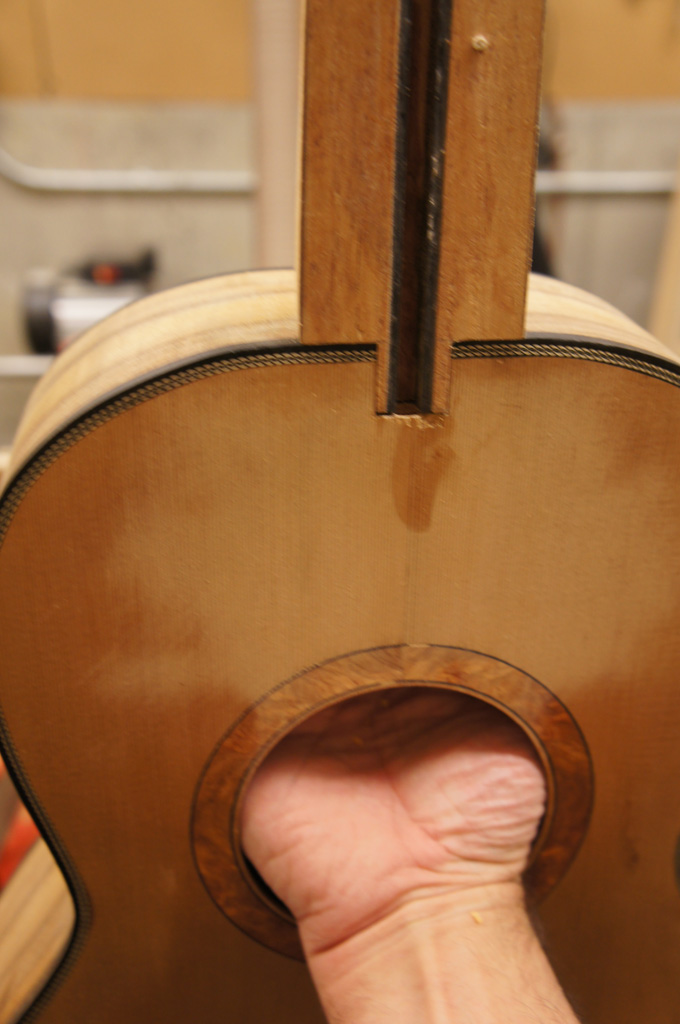
One of the nice things with the Woolson neck jig is that you can set the angle perfectly for the geometry you want and have a clean neck-to-body joint with no need to touch the cheeks. The next pictures show the neck bolted on — I'm just above the bridge with the straightedge on the fretboard.
Neck angle confirmed — the Woolson jig delivered again
✦
January 21st, 2012
I have one hiccup to finish fixing. Yesterday I shot pictures all day without a data card, so the record of me mucking up the guitar while finish sanding is lost. I am using Purflex which has very thin wood — when I installed it flush, what inevitably happened happened: I sanded through the wood portion in a small area. I cleaned out an area of the purfling past where the sand-through happened and have a replacement strip in the mail. Purflex is built so it can seamlessly mate.
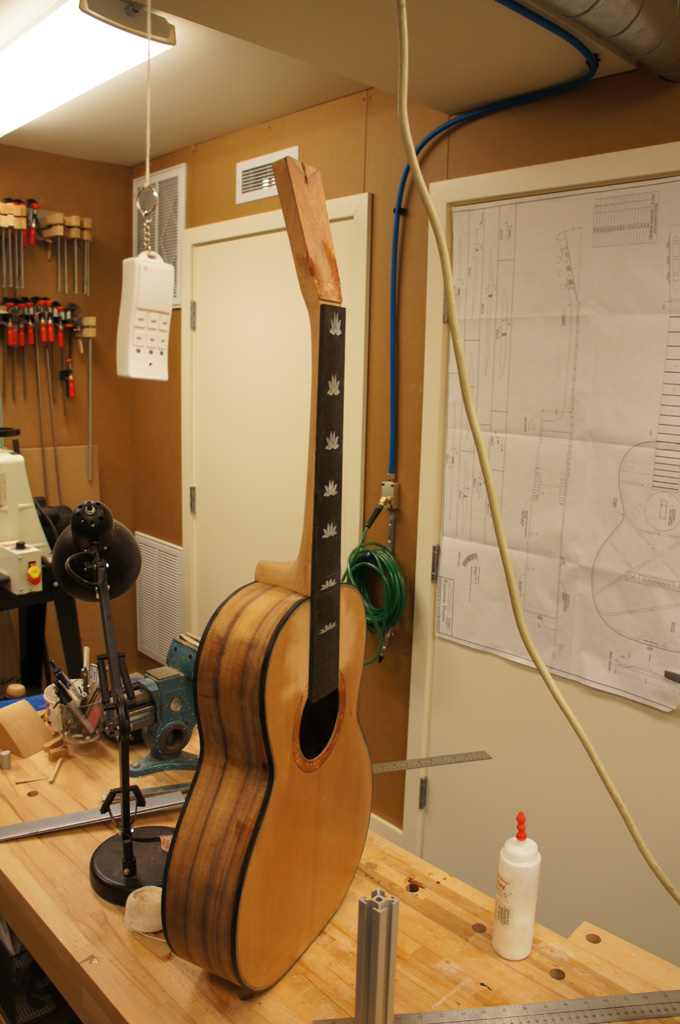
Other than that — I made my pearl logo (just taped on in the photo), the back and sides are finish sanded, and the top has a few coats of shellac in the non-mucked areas.
✦
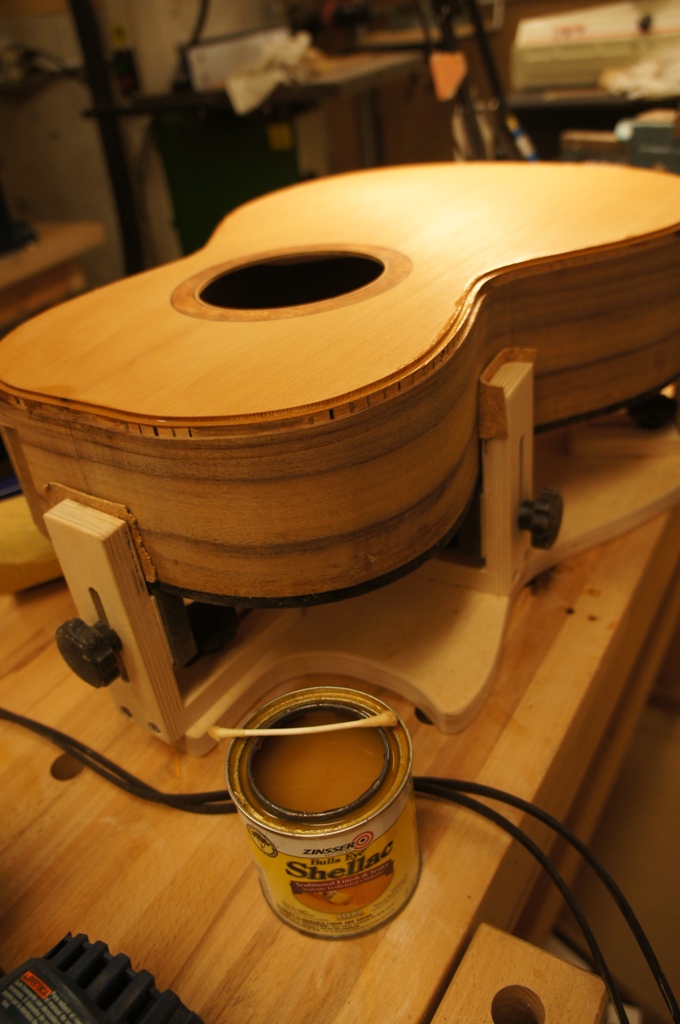
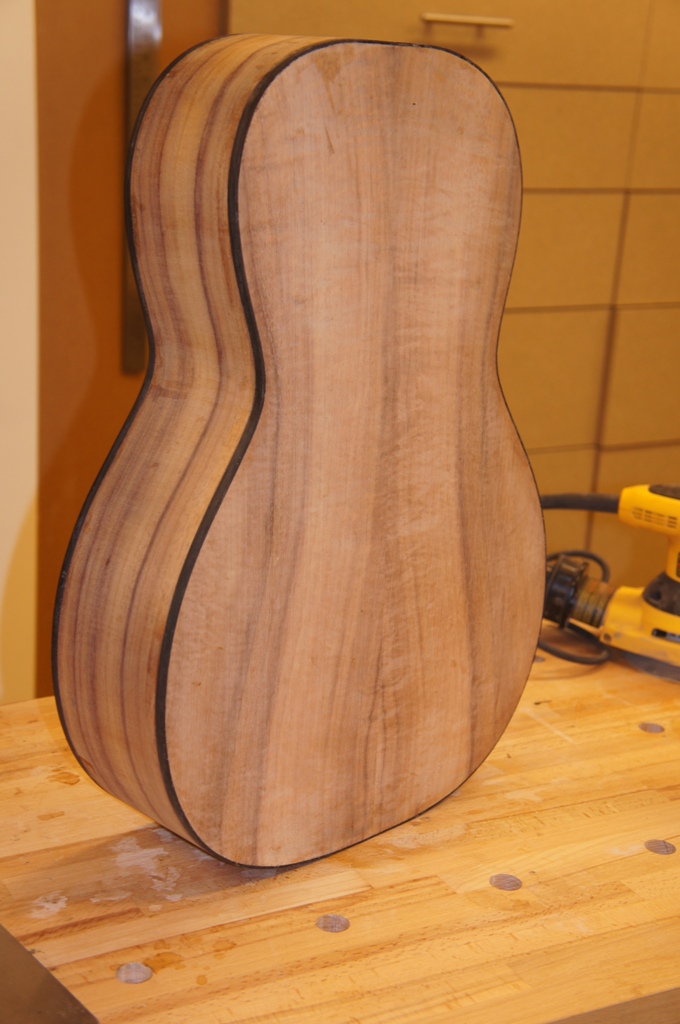
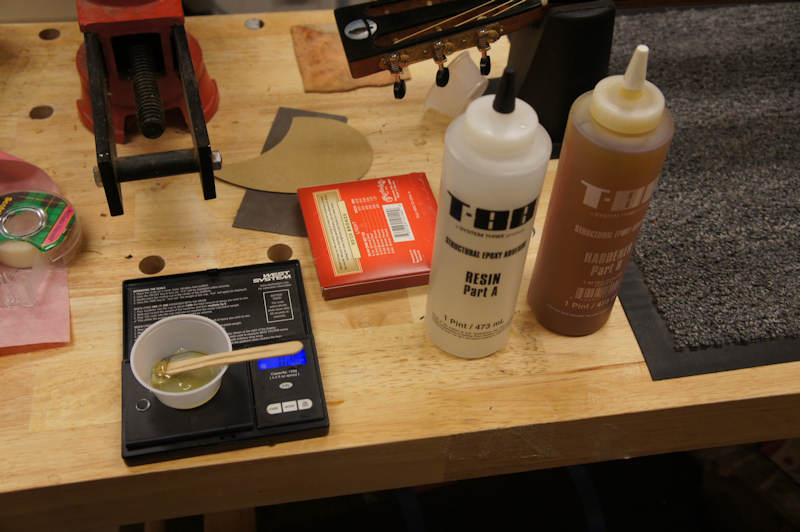
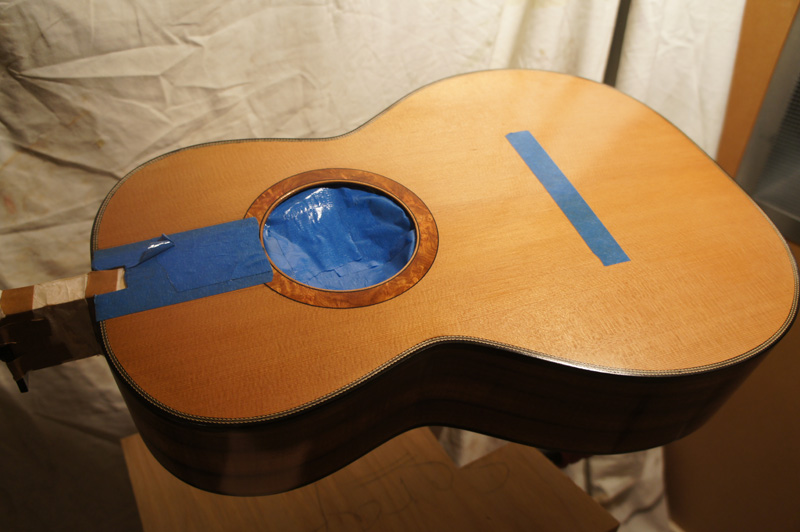
February 18th, 2012
I've started pore filling with Zpoxy. The pictures show the guitar just after applying my second coat. The neck has just one coat.
✦
March 10th, 2012
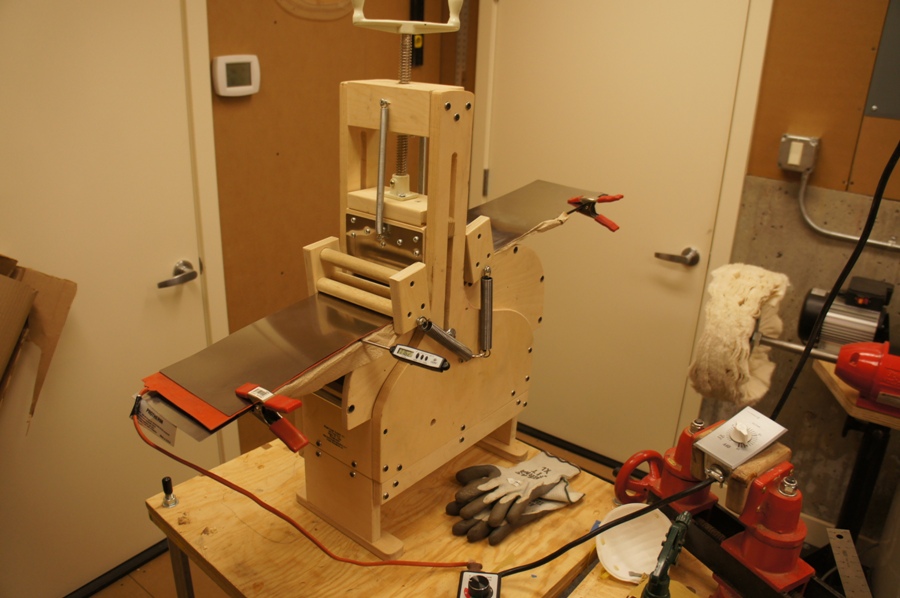
I've been a little distracted working on my bass, but little by little on the parlor I've been leveling the Zpoxy, filling small gaps, and finish sanding the top. I finally got the nerve to try my new spray gun. With my completed shop with piped-in air, I called Jeff Jewitt at Homestead Finishing (highly recommended) — he suggested the QS-125QB based on my compressor and the finish I use. It's a small gun but it sure sprays like a dream. I was quickly able to dial in the amount of finish and spray pattern, and managed for the first time to spray four very even coats with virtually no orange peel and no drips. I'm spraying Stewmac Colortone water base — I've heard it's basically EM6000.
✦
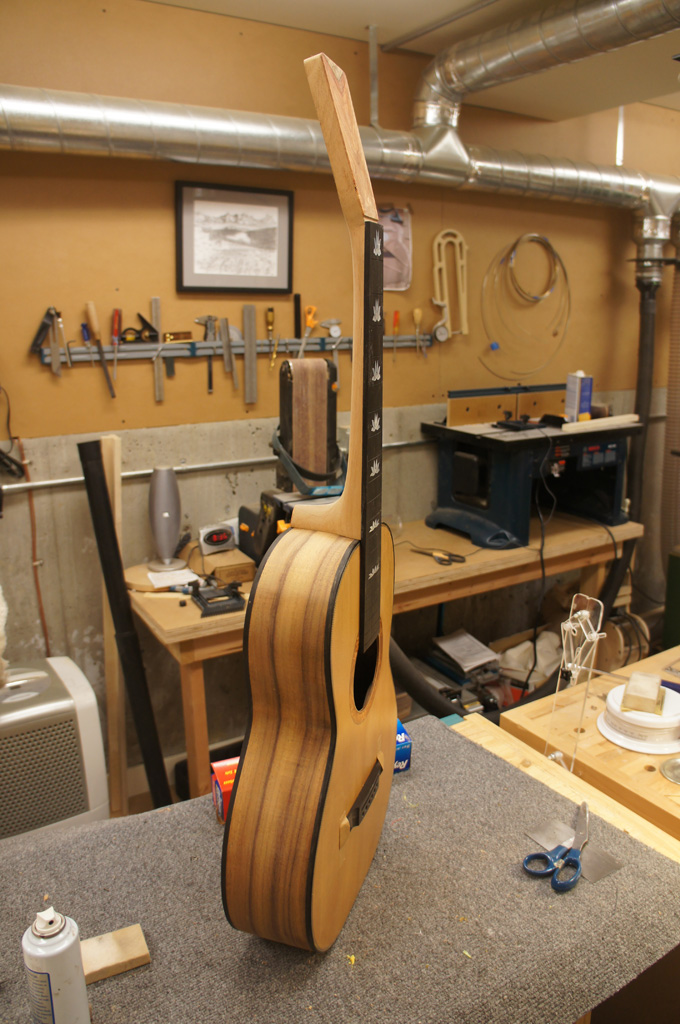
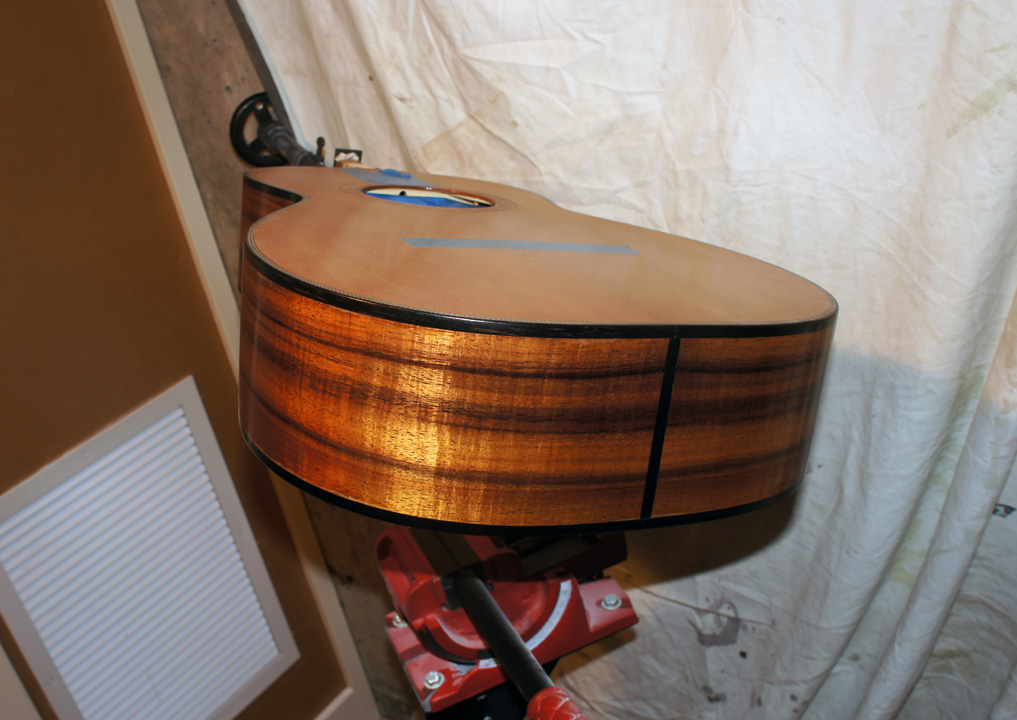
March 18th, 2012
I finished spraying the parlor guitar yesterday — 16 coats on the back and sides with eight on the top and neck. I leveled every 4 coats and it only took a very light sanding the last two times. I actually polished out the neck as I finished spraying it last week. It was perfect but I cracked the finish a tiny bit pounding in the bushings. Plenty of time to slowly build up a repair with the WB lacquer.
✦
March 31st, 2012
Getting so close. I polished the top and checked the neck angle before gluing it on — it ended up right where I wanted with the smallest bit of fall-off. When I set the frets I ended up not having to level and re-crown as the fretboard was dead level when I started and all frets set well. Stopping for the afternoon — or I'll start rushing.
✦
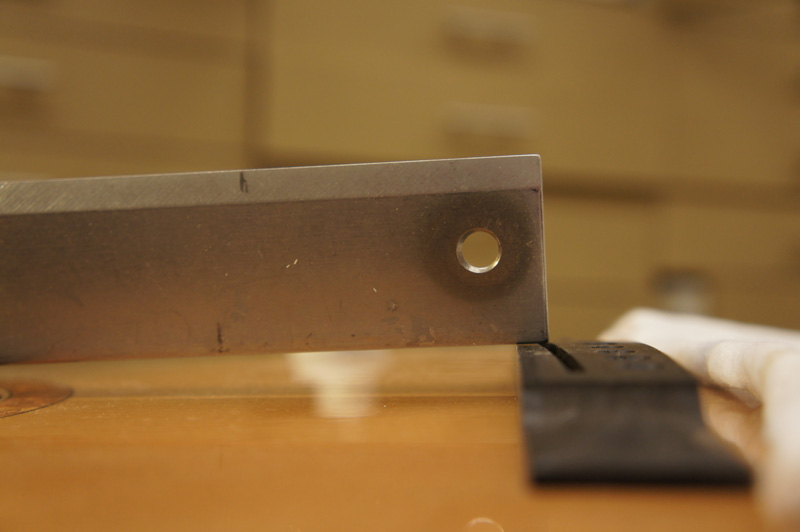
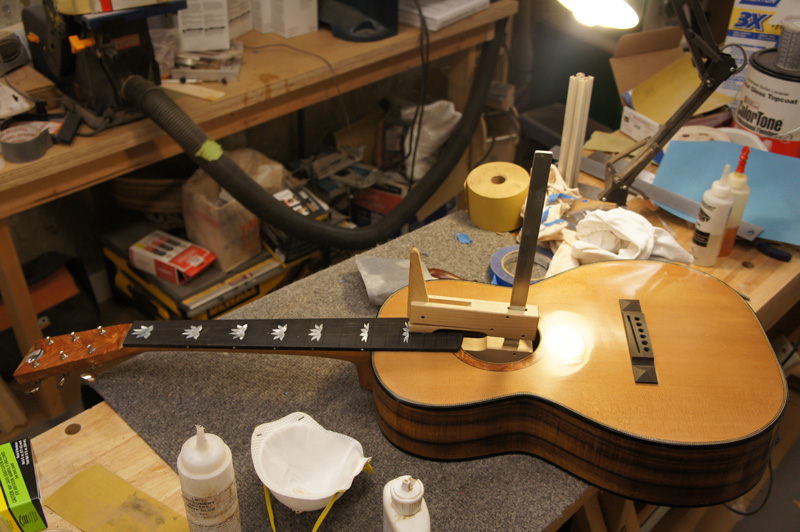
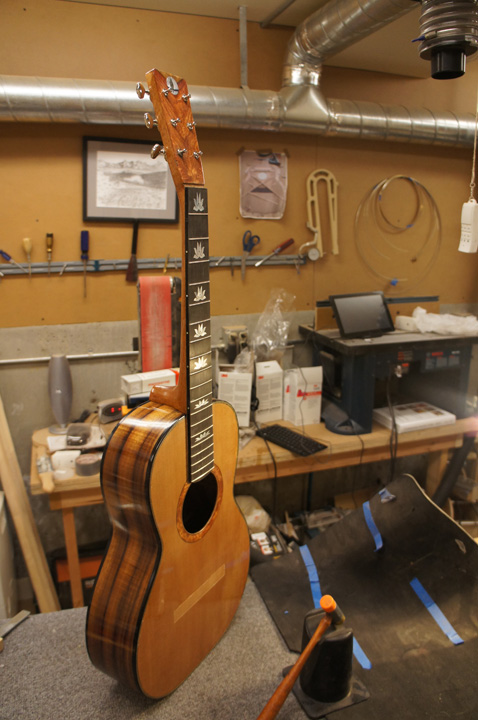
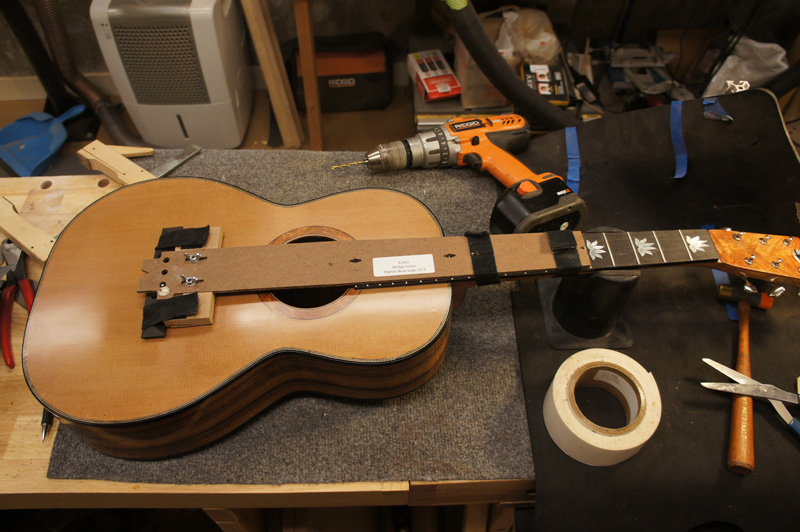
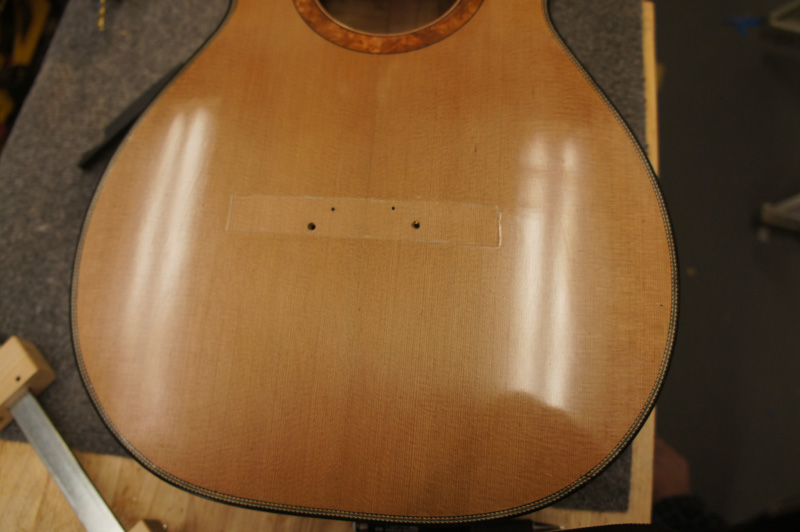
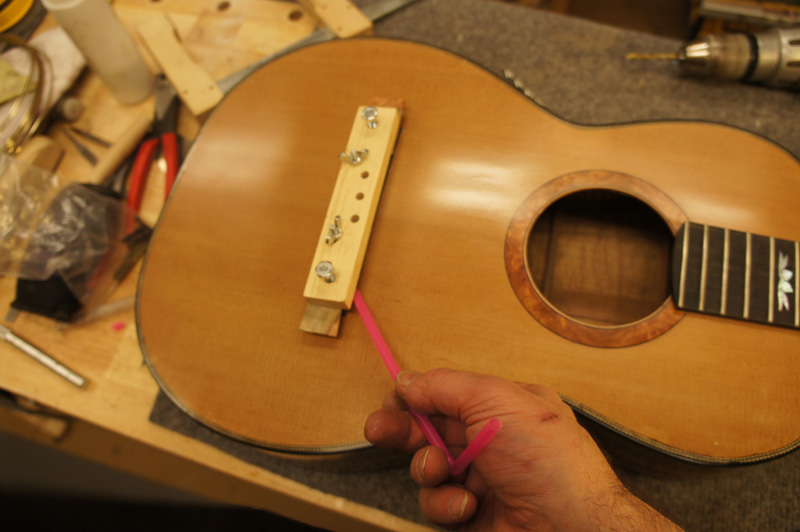
April 1st, 2012 — Completed!
This is the last construction step before setup. I used my KMG bridge setting tool for the short Martin scale to perfectly set the bridge. My taped area was a little smaller than the bridge — once I set the bridge I bolted it through the E-strings and with a sharp X-Acto knife cut the perfect edge. Then I worked to the line with a very sharp chisel. Once the bridge (sanded to a 28' radius) fit perfectly on the top, I used my KMG bridge clamp to glue it down.
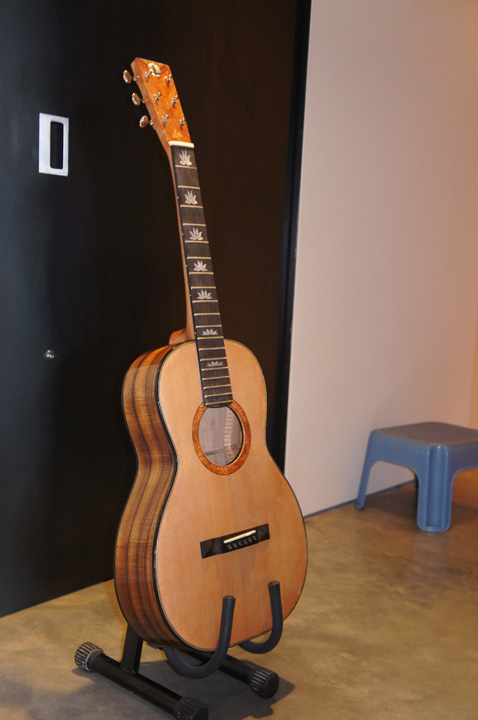
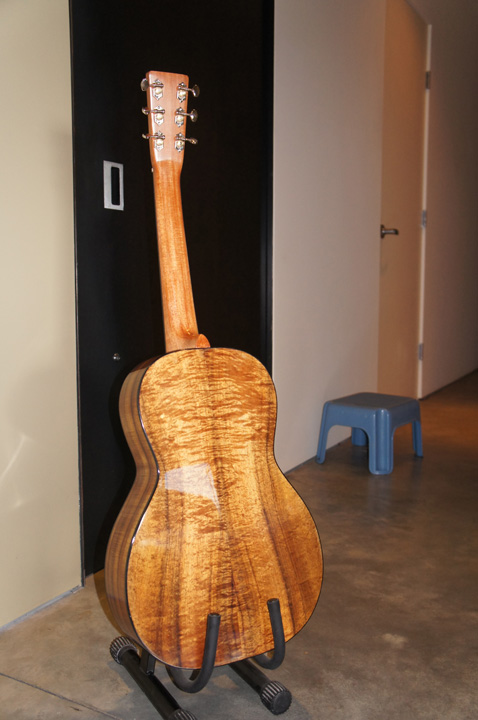
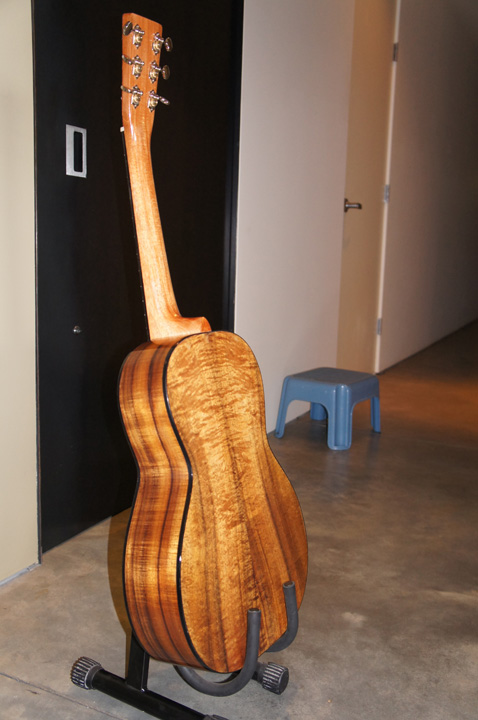
I just finished this guitar — waiting a day for the bridge glue to cure before stringing it up. But other than that, ready to go. The guitar was shipped to Ann on May 21st and she received it the following Wednesday. I was a little slow shipping it... I played it for a week or so first.
Ann's Parlor Guitar — complete, photographed, and about to be played for a week before shipping
Koa/Cedar guitar made for my niece, being played poorly by me.